


Today, I want to share my favorite creative container garden ideas for small and large gardens, from compact entryways to expansive landscapes.
I’ve yet to encounter a garden that doesn’t include at least a few planted containers, whether for structure, seasonal color, or year-round interest.
Artfully placed near the front door, grouped on a back patio, or woven into garden beds, containers are a versatile design tool cherished by gardeners everywhere.
When I use containers in my garden, they often serve a dual purpose.
Not only do they enhance my garden, but they also help solve various gardening challenges, such as covering up unsightly areas, filling in gaps left by perennials, and guiding the eye throughout the garden (just to name a few!)
So let’s begin! Here are my top 5 ways to use containers in the garden:
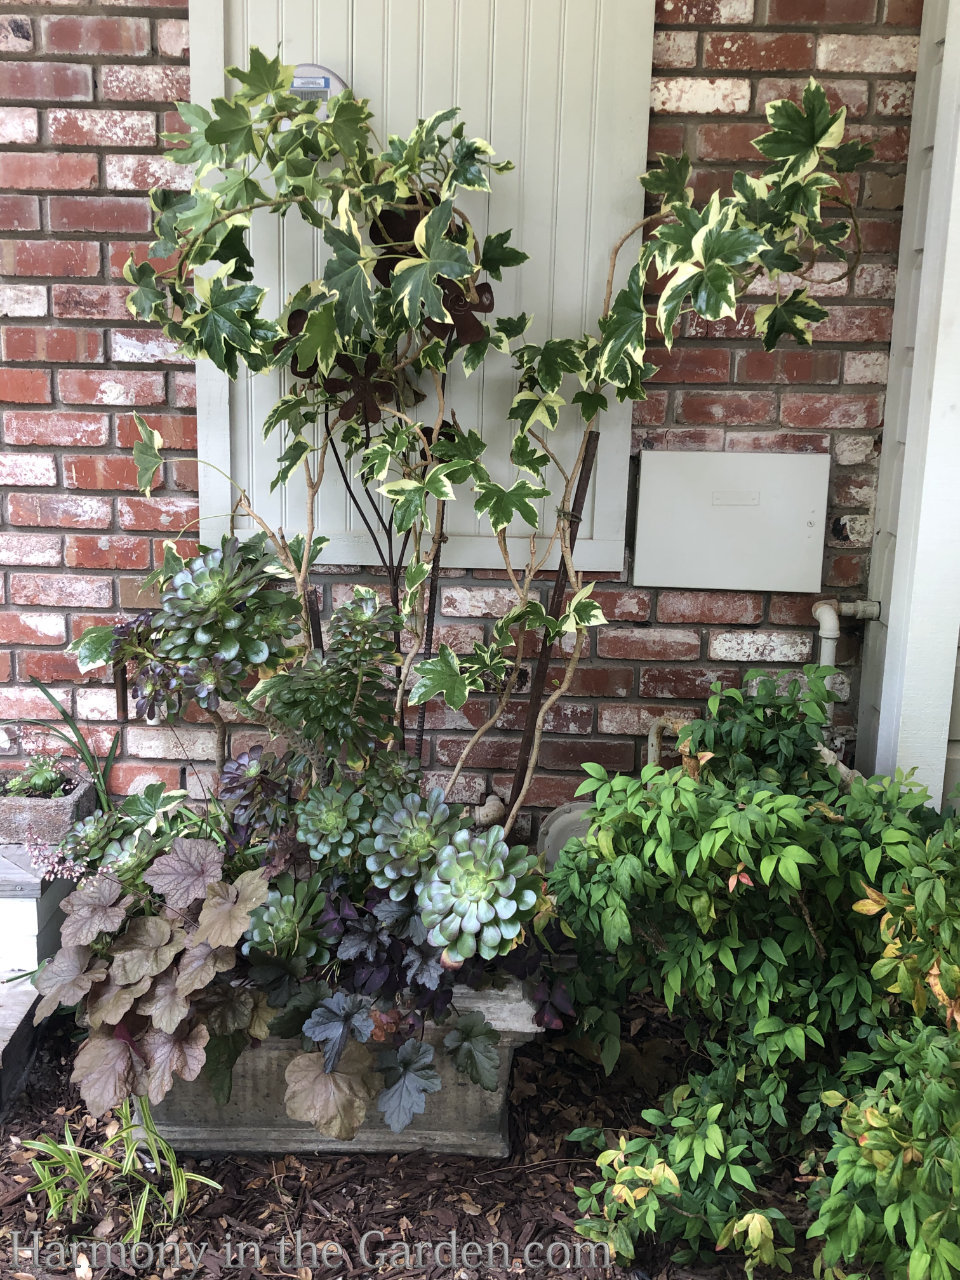
In this example, the area beneath my carport was quite unsightly, with one eyesore after another: an electric meter, a gas meter, and an electrical panel mounted on the brick wall.
To address this, we made a frame that matched the siding of the nearby walls, and placed magnets on the back to attach it to the electrical panel; however, that alone wasn’t enough.
That’s when the rectangular container, placed in the narrow strip in front of the panel, came to the rescue!
I planted a tall evergreen ‘Fatshedera Angyo Star’ at the back of the container to add height and soften the new frame, along with low-growing, colorful heucheras planted in the front.
This homeowner used a grouping of narrow containers of varying heights to disguise the unsightly water meter attached to the house.
Now it not only adds color to this shady side yard but also prevents people from hitting their shins on the meter!
Click here to read more about the amazing transformation of this narrow side yard.
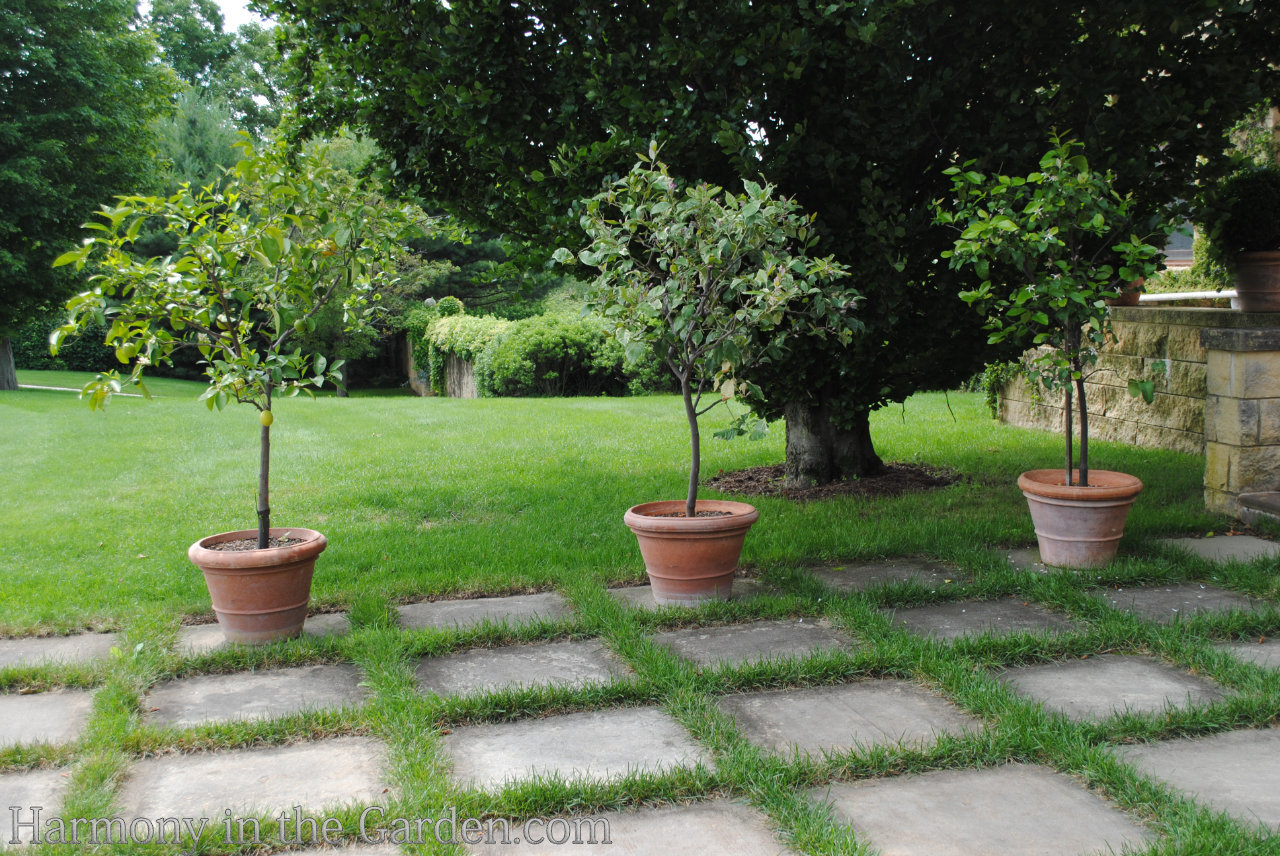
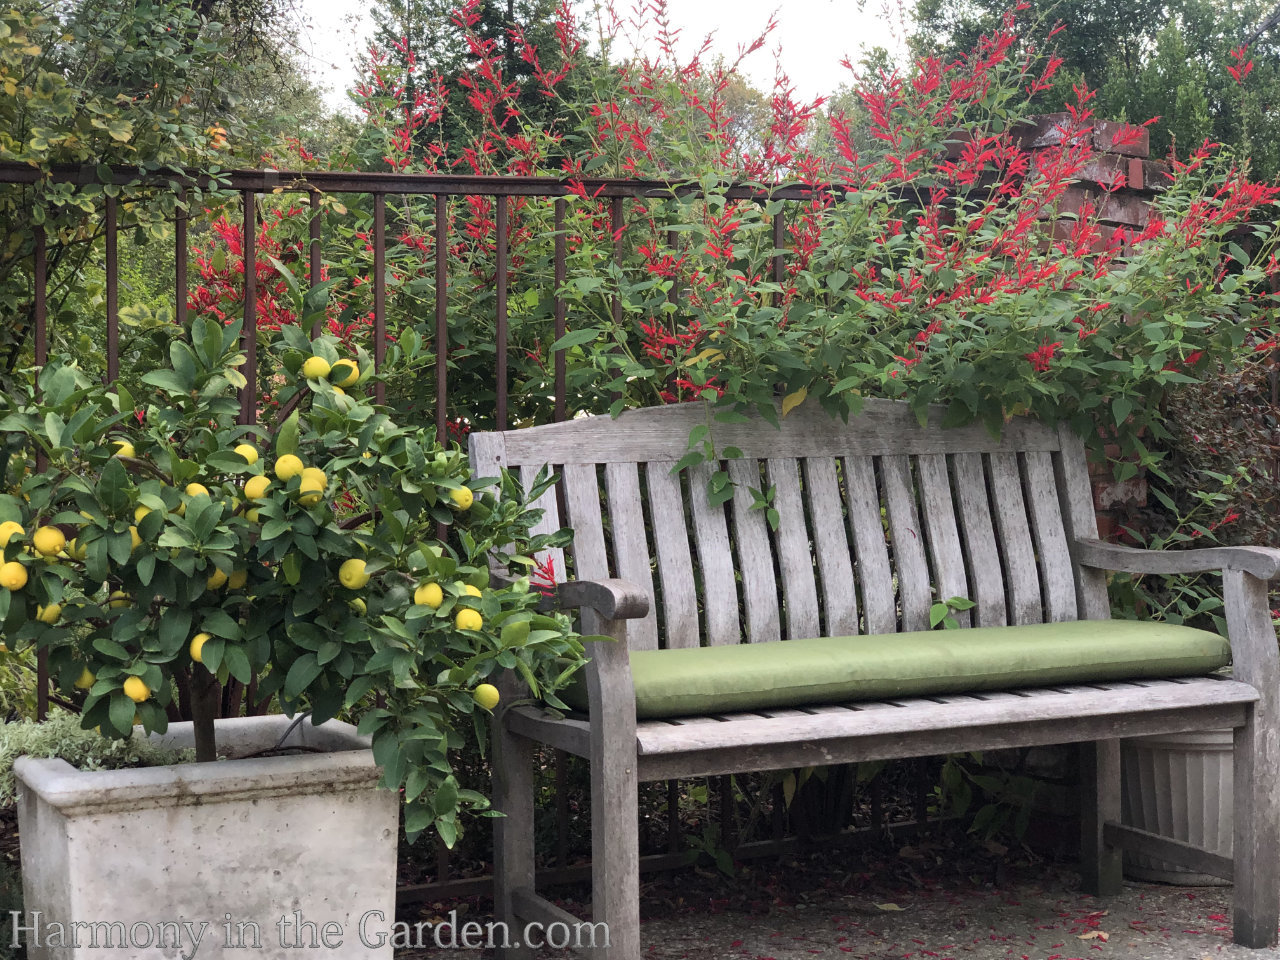
Years ago, I toured the garden of Linda Allard (the designer behind Ellen Tracy clothing) in Litchfield County, Connecticut.
I loved how she created a simple yet effective visual barrier between the small patio and the neighboring lawn by placing three oversized terra cotta containers planted with lemon trees.
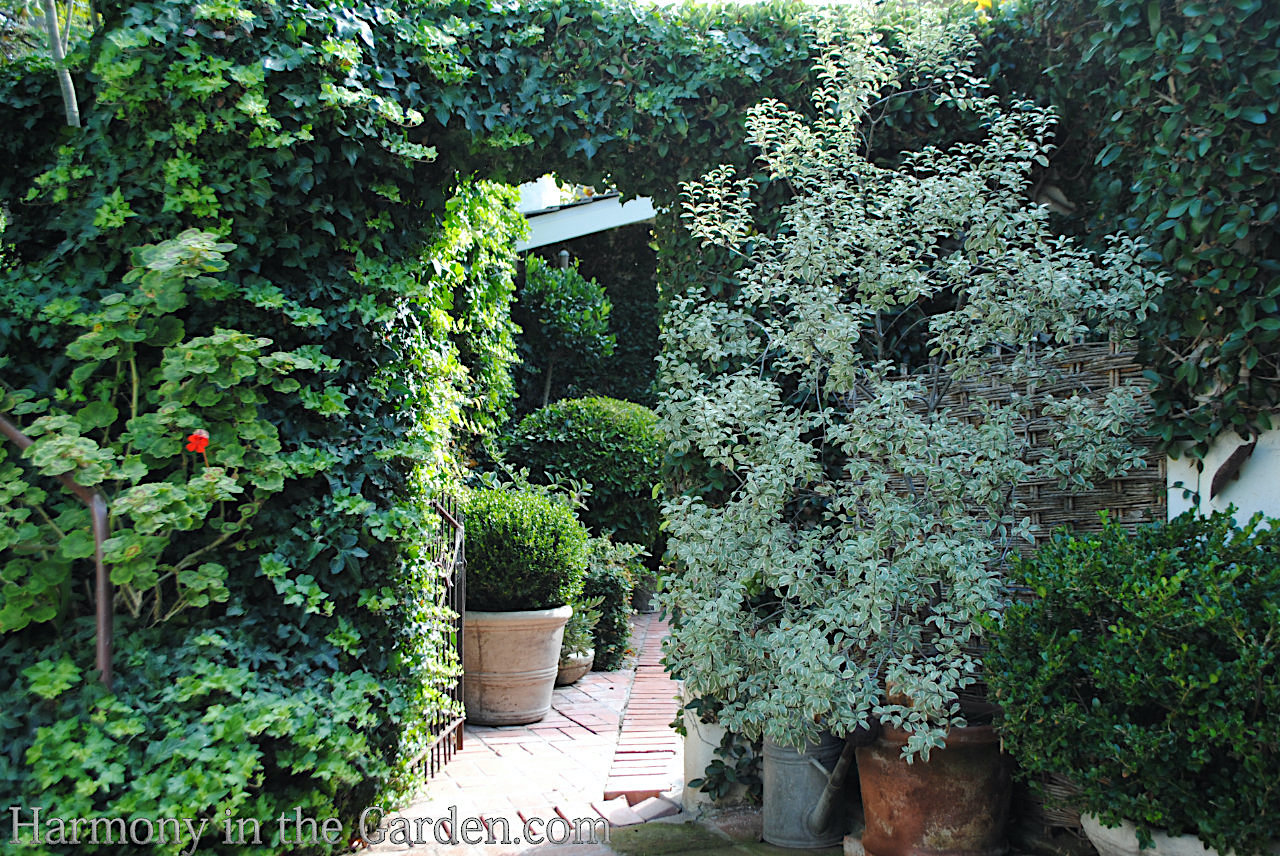
In Lani Freymiller’s enchanting garden, she has placed containers with single specimens of evergreen shrubs on either side of a narrow gate.
On the right, there is a tall variegated pittosporum, and on the left, a low-growing boxwood ball. The variety of colors and sizes in the plants visually invites guests to continue exploring beyond the gate.
Click here to see more of Lani’s magical garden.
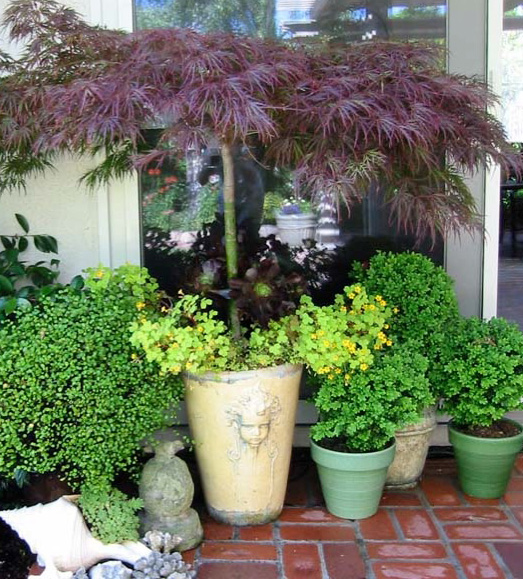
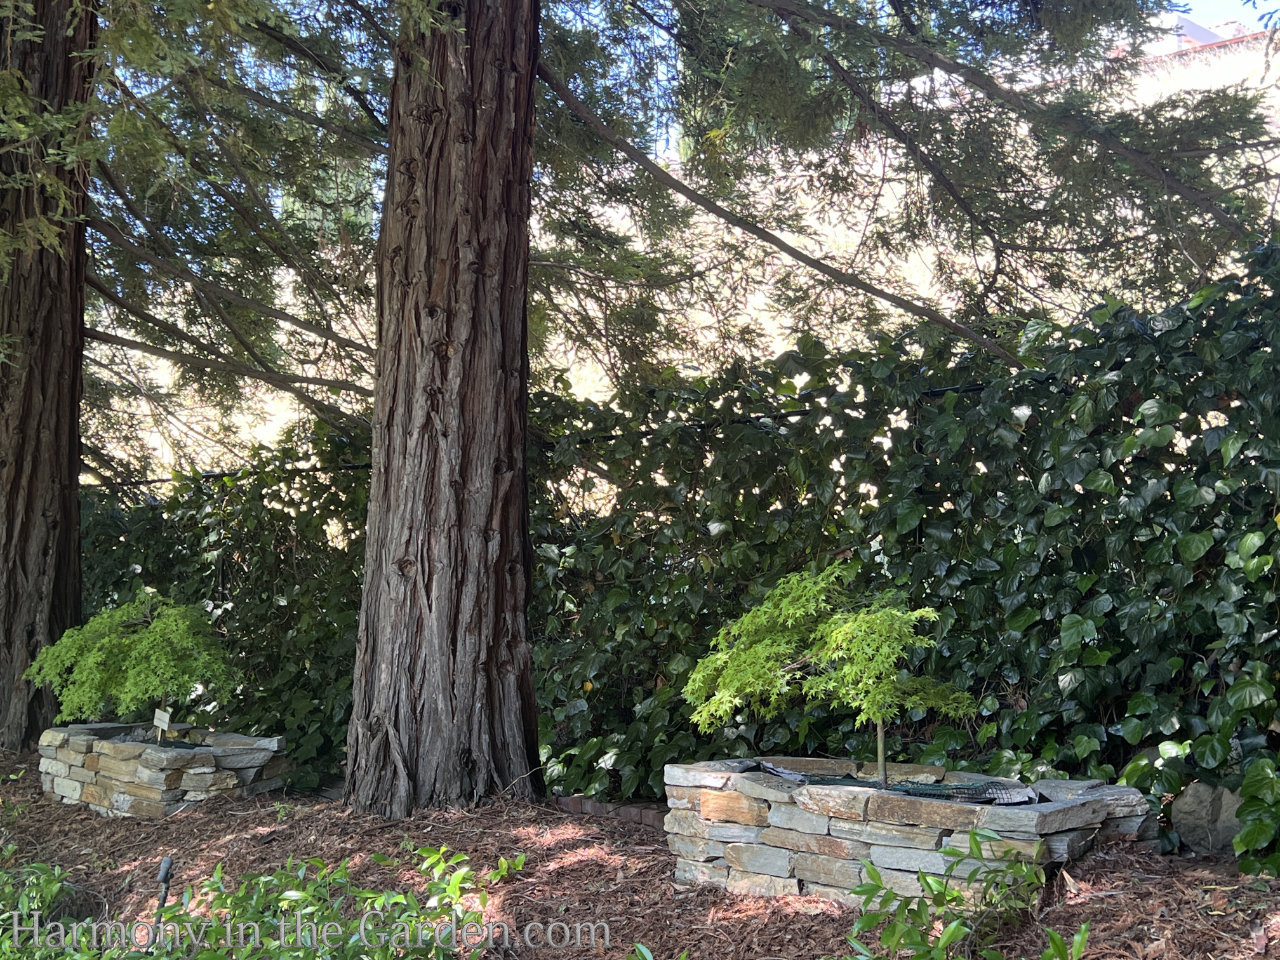
While on a local garden tour last year I noticed the homeowner had several containers placed under his massive Redwood trees, filled with various Japanese Maples.
The containers were hooked up to irrigation, but other than that and the occasional feeding, it’s a fantastic solution to planting under these trees.
Click here for more ideas on how to plant around tree roots.
I have several resin containers that I use specifically to fill in the seasonal gaps during my garden’s downtime.
I like to use dark brown containers as they blend in and somewhat disappear when surrounded by neighboring plants.
And, because resin is lightweight, they’re much easier to move around whenever needed.
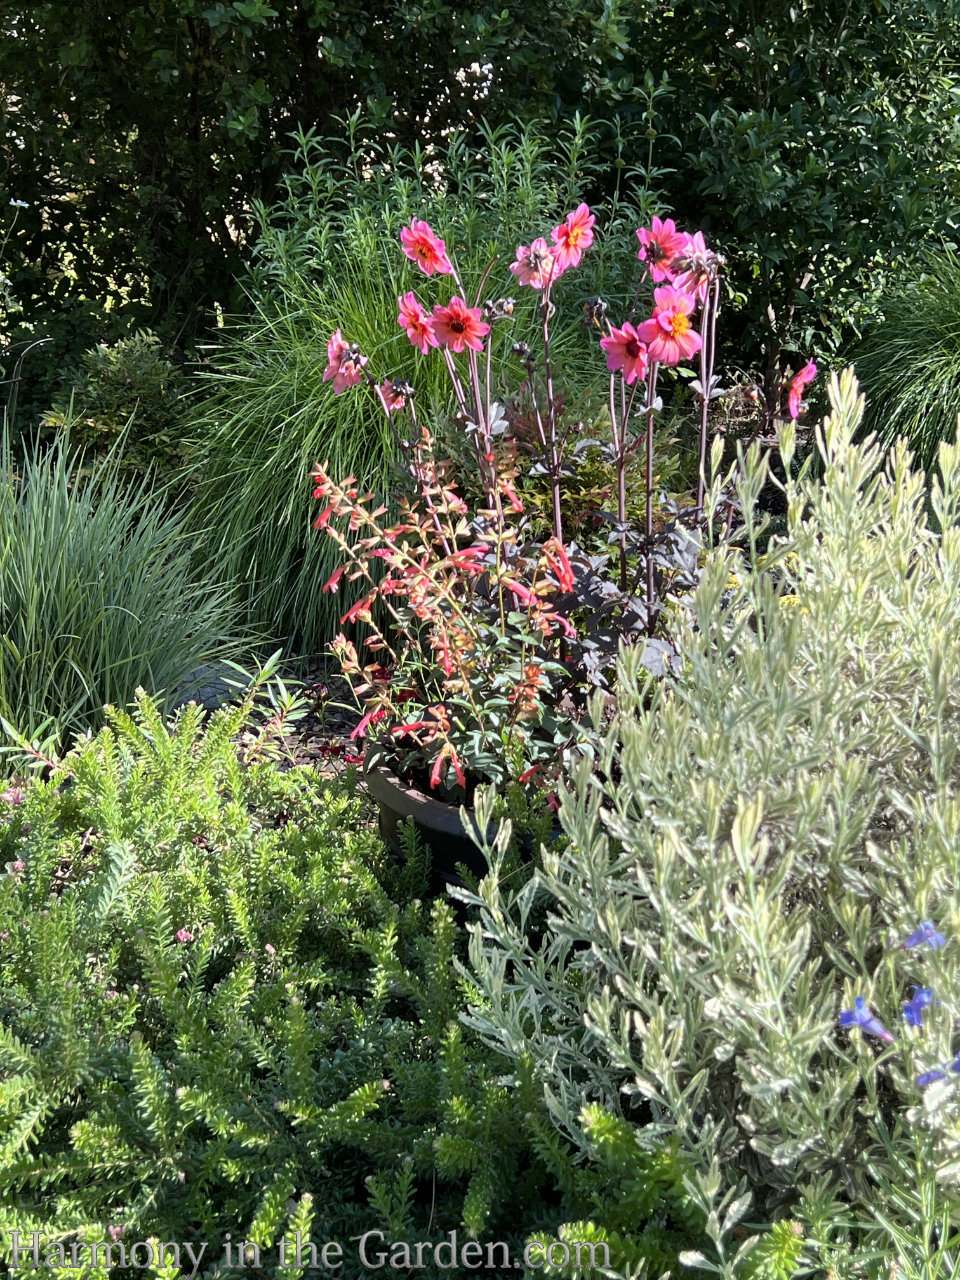
In this example, I have a resin container planted with salvia ‘Ember’s Wish’ and dark-foliage dahlias that add height and color while waiting for the surrounding late-summer perennials and shrubs to bloom.
When finished blooming for the season, I transplant the salvia to another part of my garden and move the container to an out-of-the-way spot in my garden until needed for next time.
Here’s the same resin container as above the following year (you can see the same dahlia’s dark maroon foliage.)
However, I’ve switched up the planting by using craspedia (Billy Buttons) for contrasting colors and shapes.
Next year who knows what I’ll do! The dahlia will remain, but I’ll have fun trying something new (though tbh I really love the craspedias and might just let them stay!)
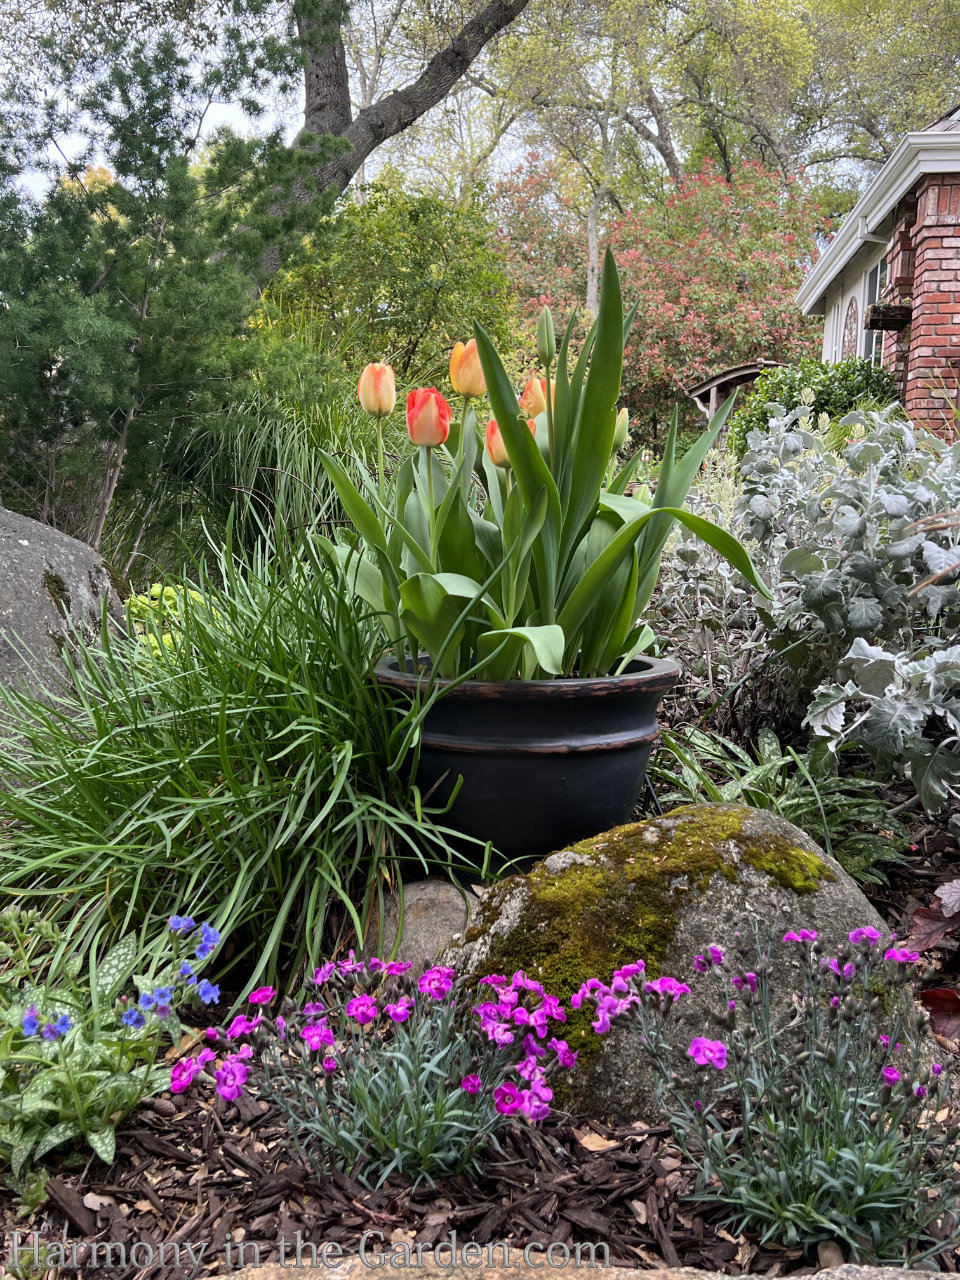
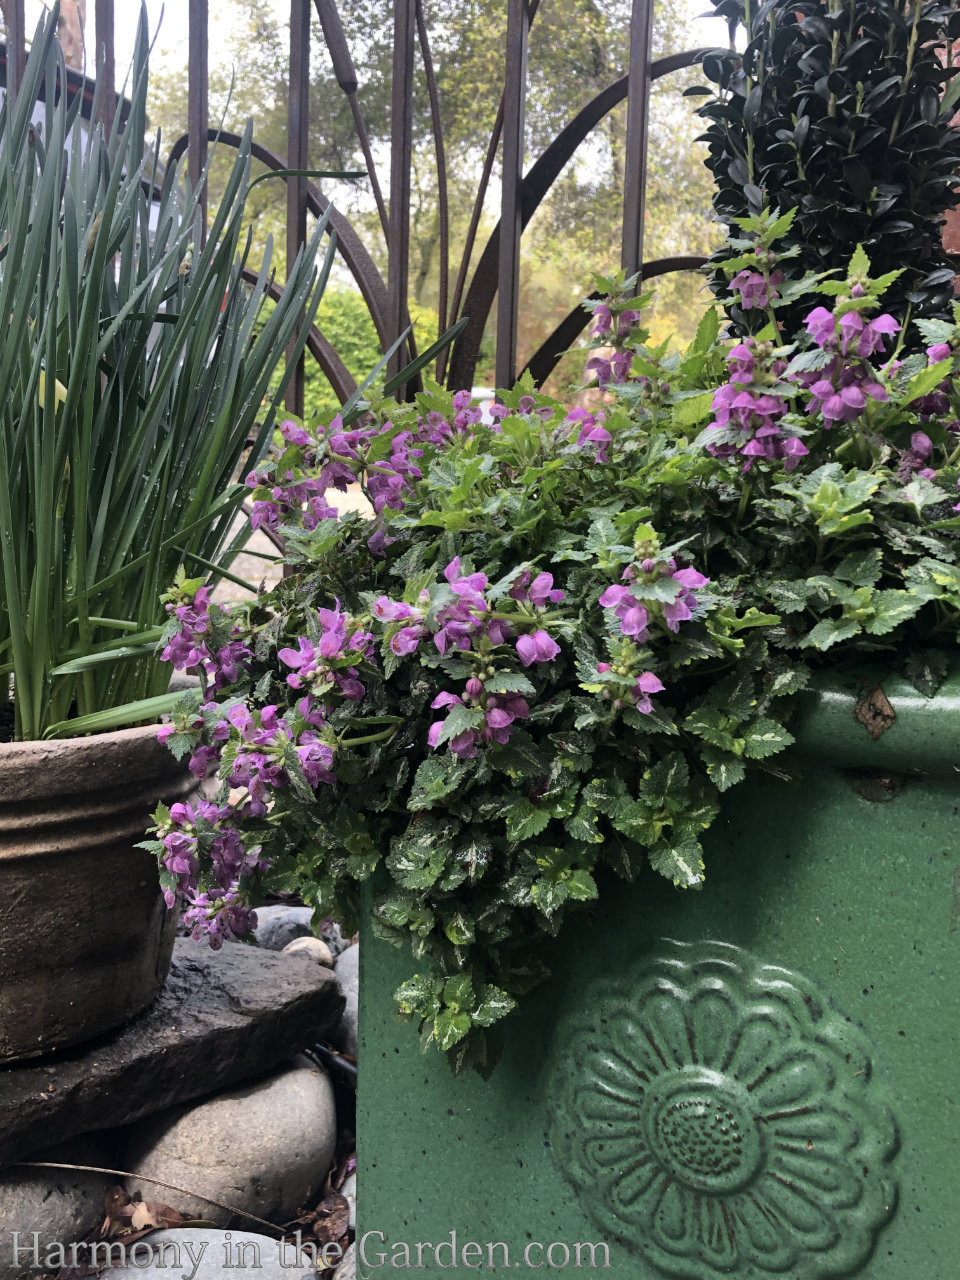
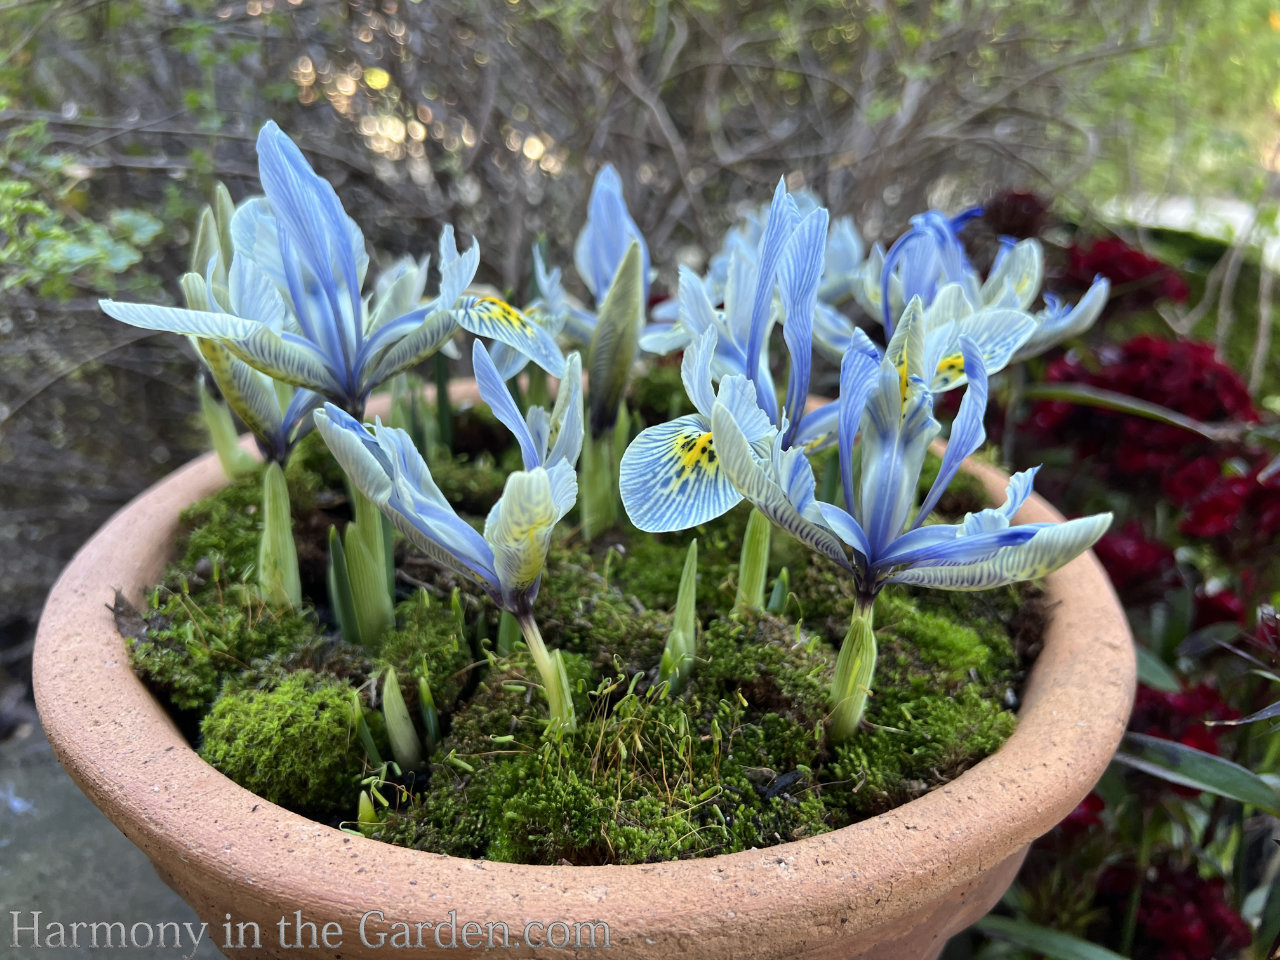
Bulbs are a natural for filling in the blanks in your garden left by dormant perennials.
During the late winter months, when there’s not much happening in the garden, I like to move pots of colorful bulbs into these blank spots and place them where I can see them from inside my home.
For more about my favorite warm-climate bulbs and how I design with them, click here.
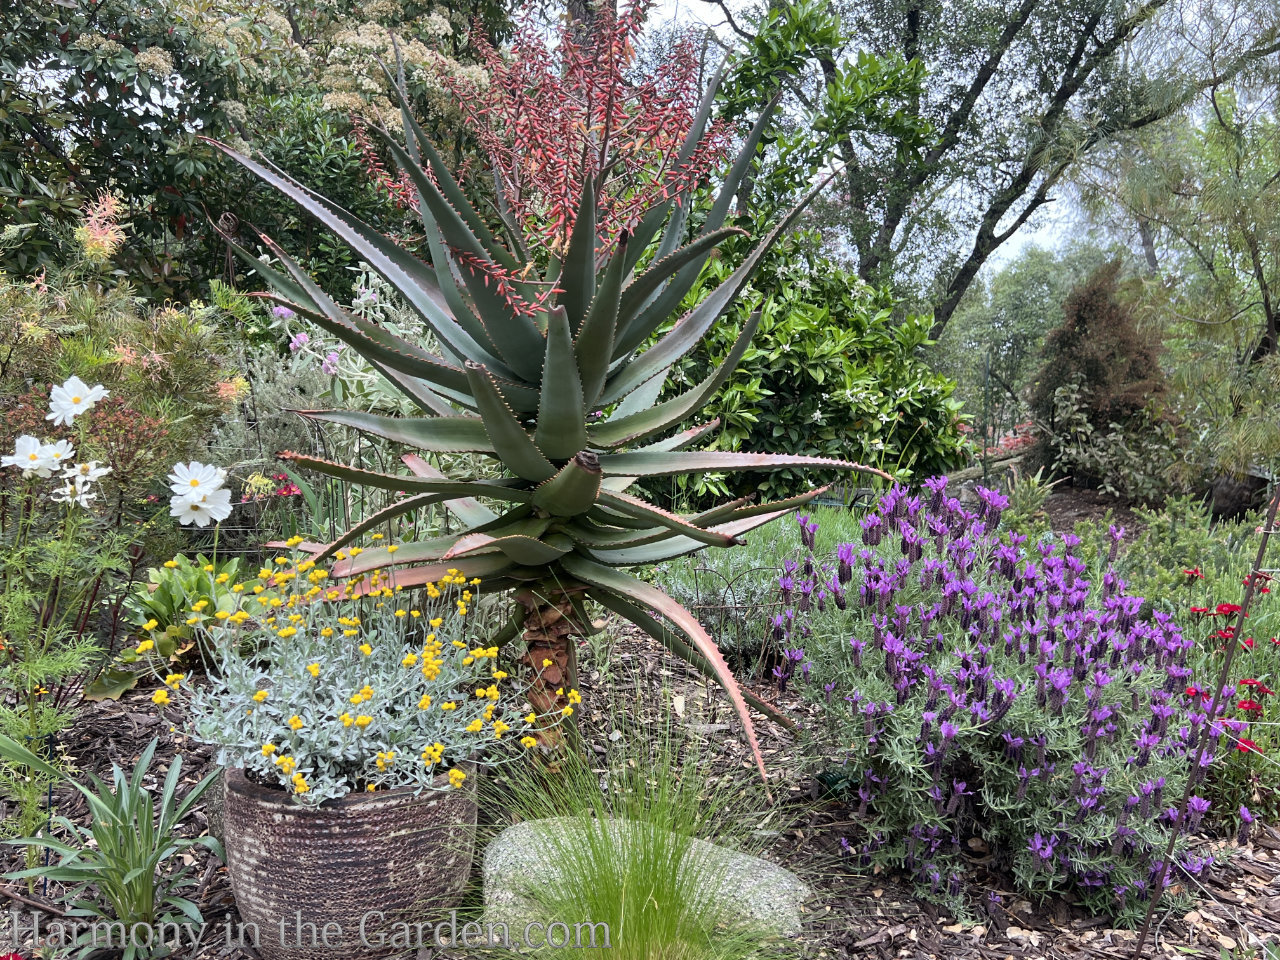
Here’s another example in my garden where the aloe ‘Fire Ranch’ has grown so tall that in the winter, its bare stem sticks out like a sore thumb.
My solution is to place a container filled with long-blooming chrysocephalum apiculatum ‘Flambe’ to fill in the gaps until the surrounding perennials are once again in bloom.
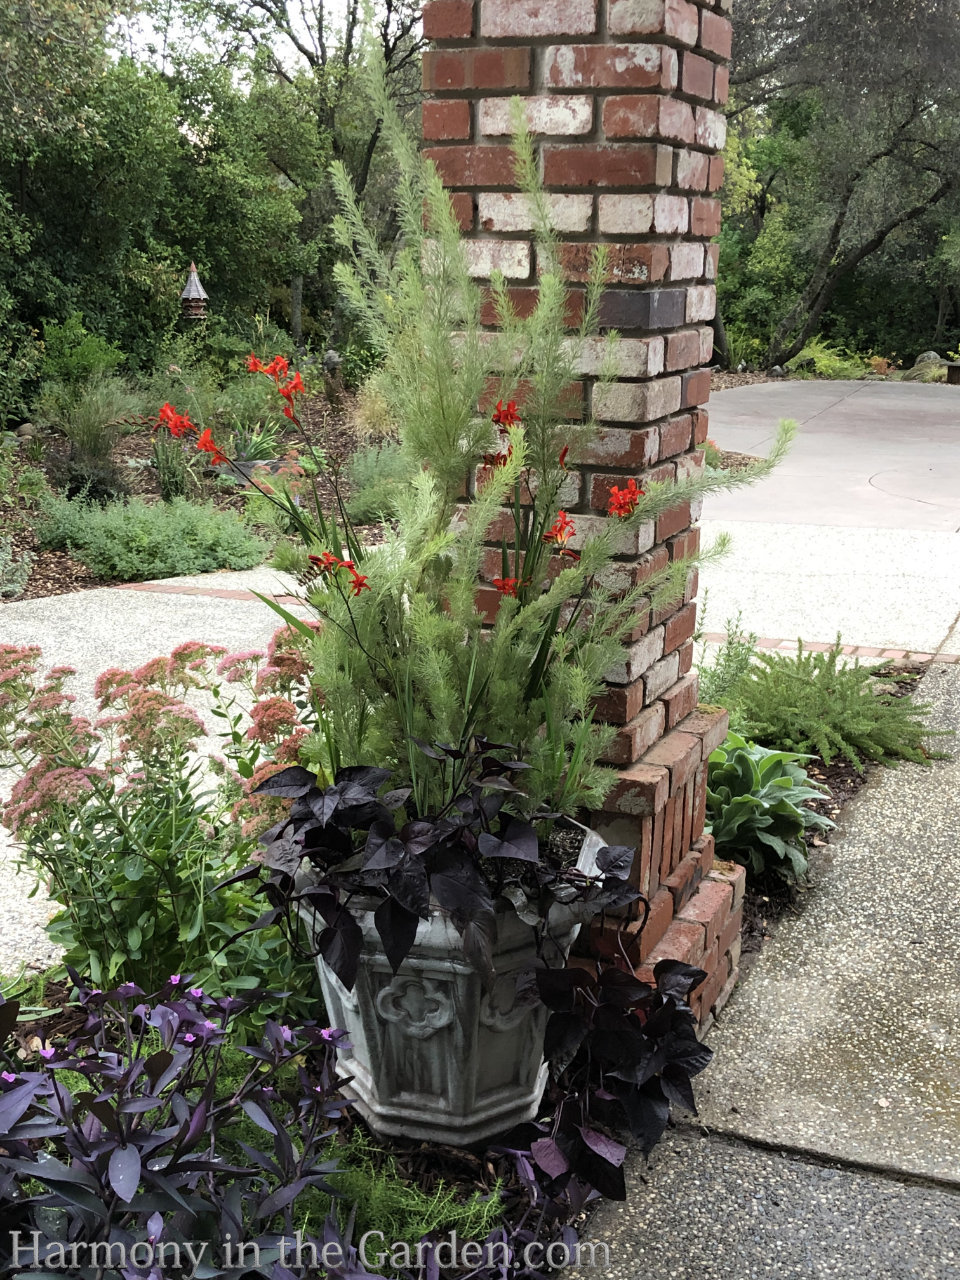
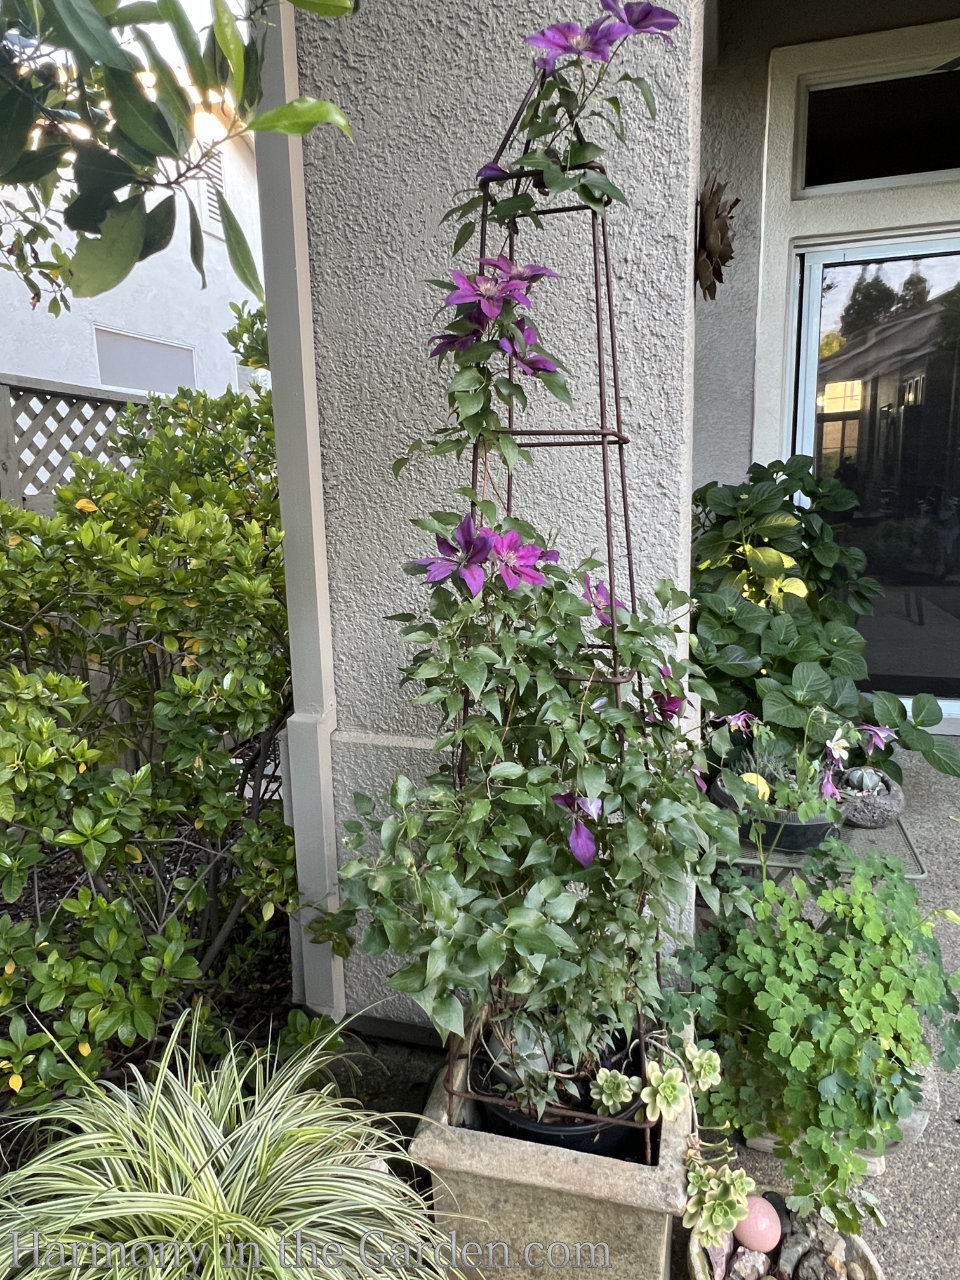
Sometimes it’s challenging to add interest to really small or narrow garden beds. A container can be the solution, not only adding height (which can be difficult to attain in a small and narrow bed) but excitement, as well.
I’ve previously written about the skinny, crescent-shaped bed underneath my carport (click here for more pics), but the star of the bed is this container.
It’s a scorching hot area, so whatever lived in the container must be tough. The Australian Wooly Bush (adenanthos sericeus) is perfect and thrives with blistering heat and little water.
And, the lipstick-red blooms of the crocosmia ‘Lucifer’ add a pop of color and attract every hummingbird in the neighborhood.
If that isn’t drama, I don’t know what is!
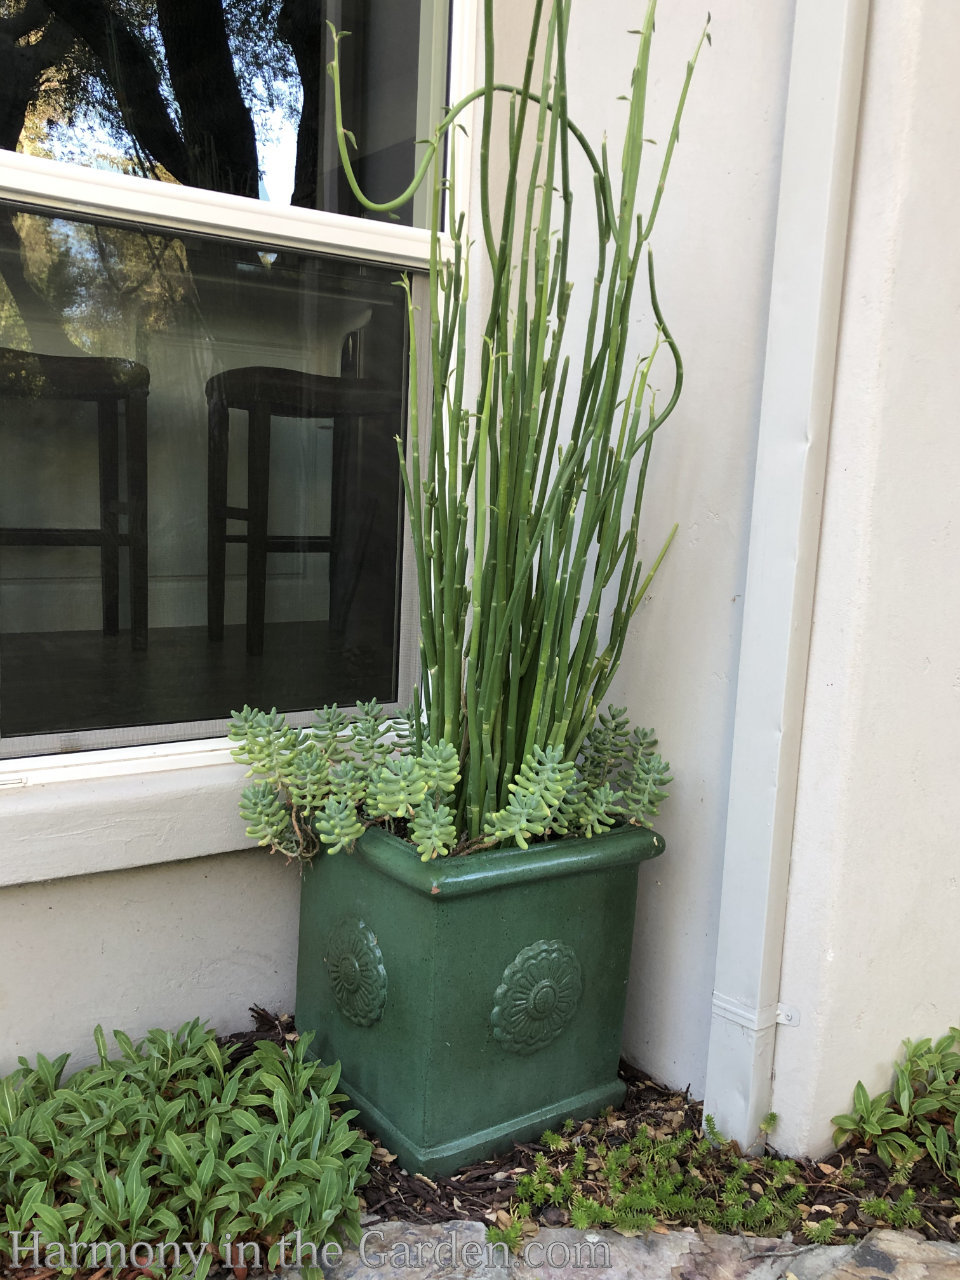
Here’s another tight space tucked in the corner of a very skinny bed.
Elevated in a container is the evergreen euphorbia lomelii (also called the Slipper Plant), perfect for the tightest spaces.
It grows upright to 6′ high by only 2-3′ wide and looks great every day of the year.
It easily withstands blistering sun, winter temps in the low 30’s, and very little water.
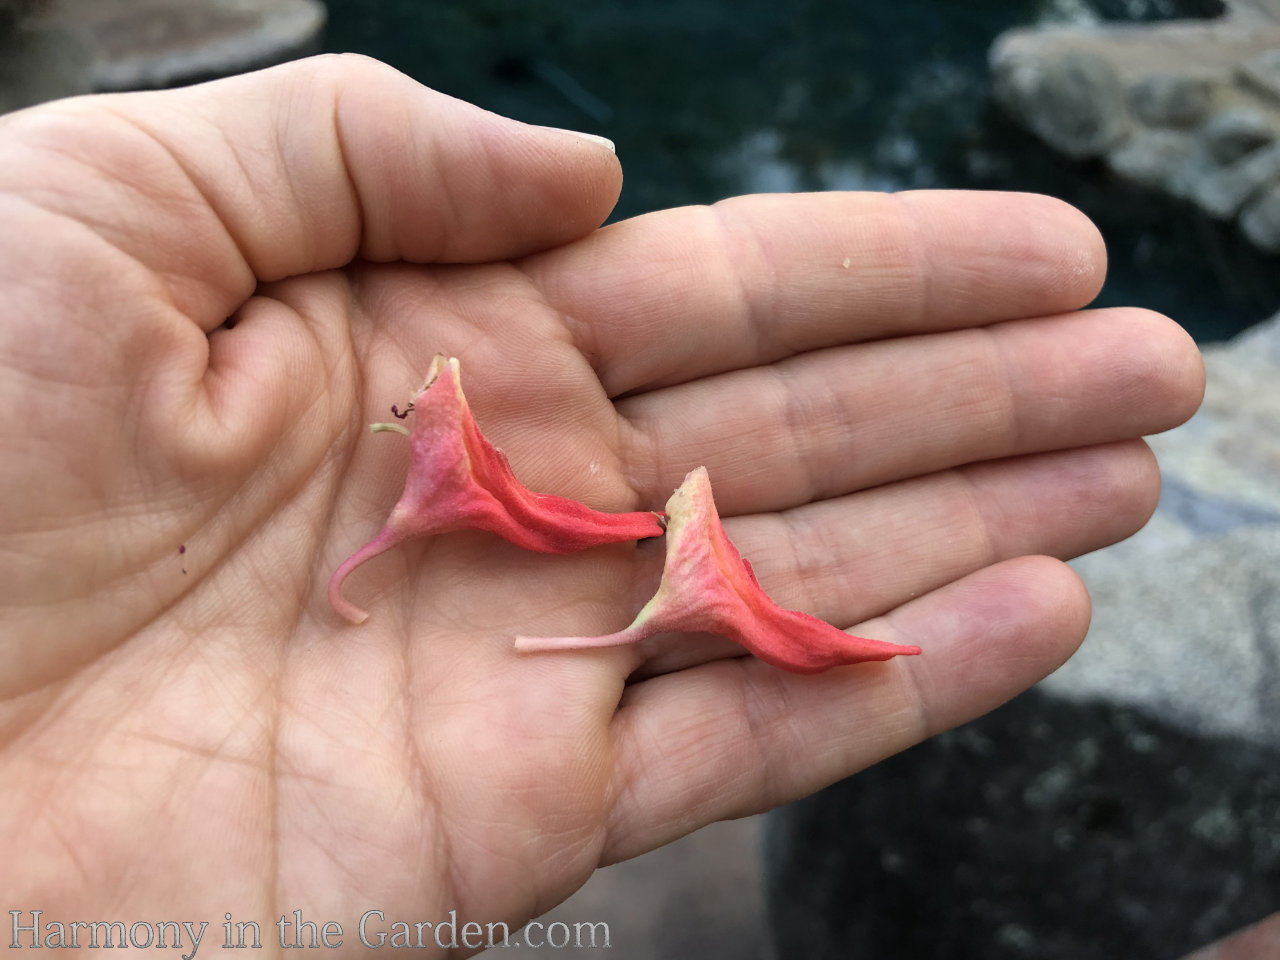
Take a look at the little flowers below to see why its common name is ‘Slipper Plant.’
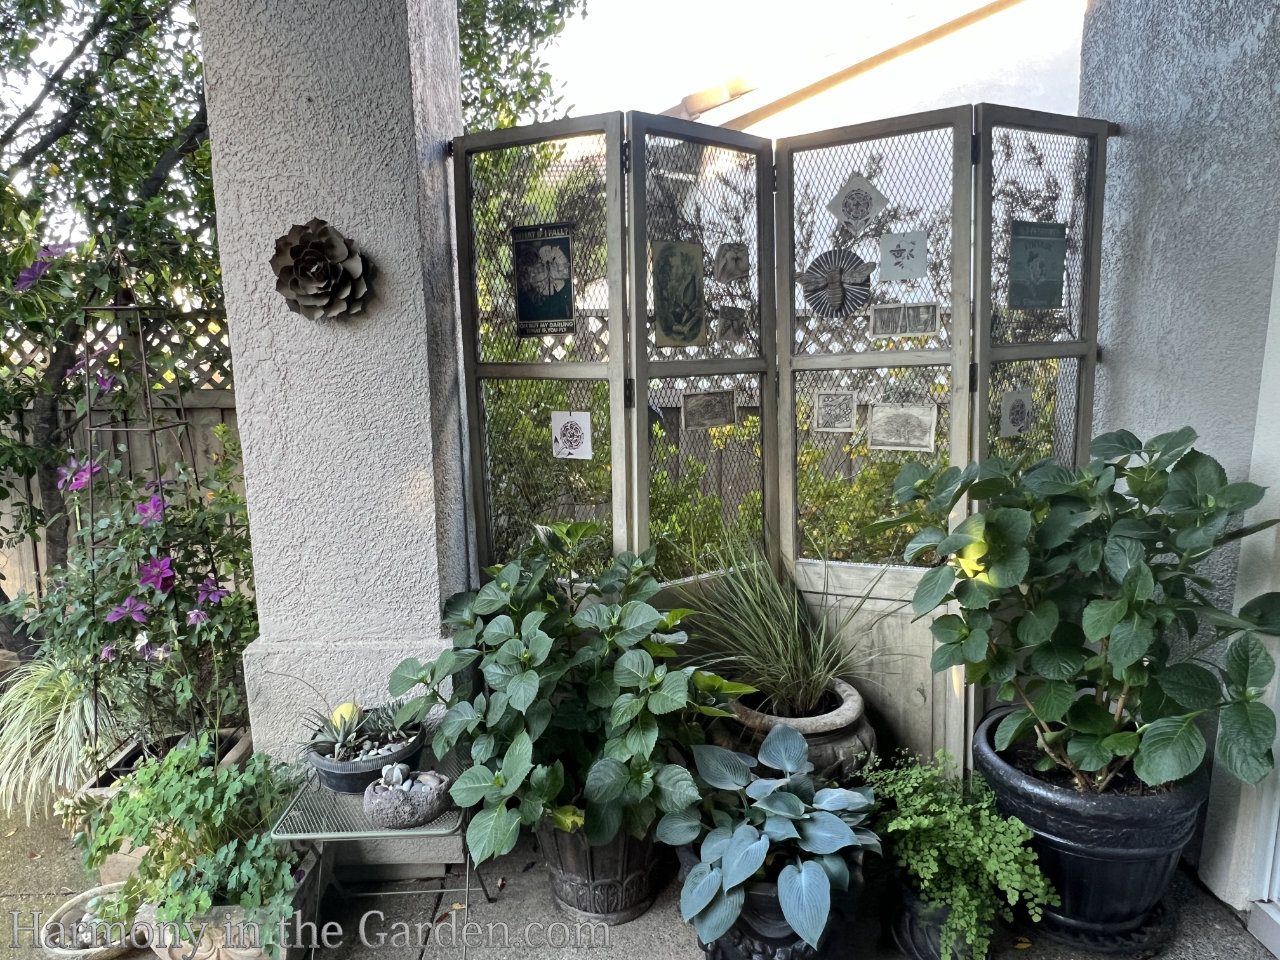
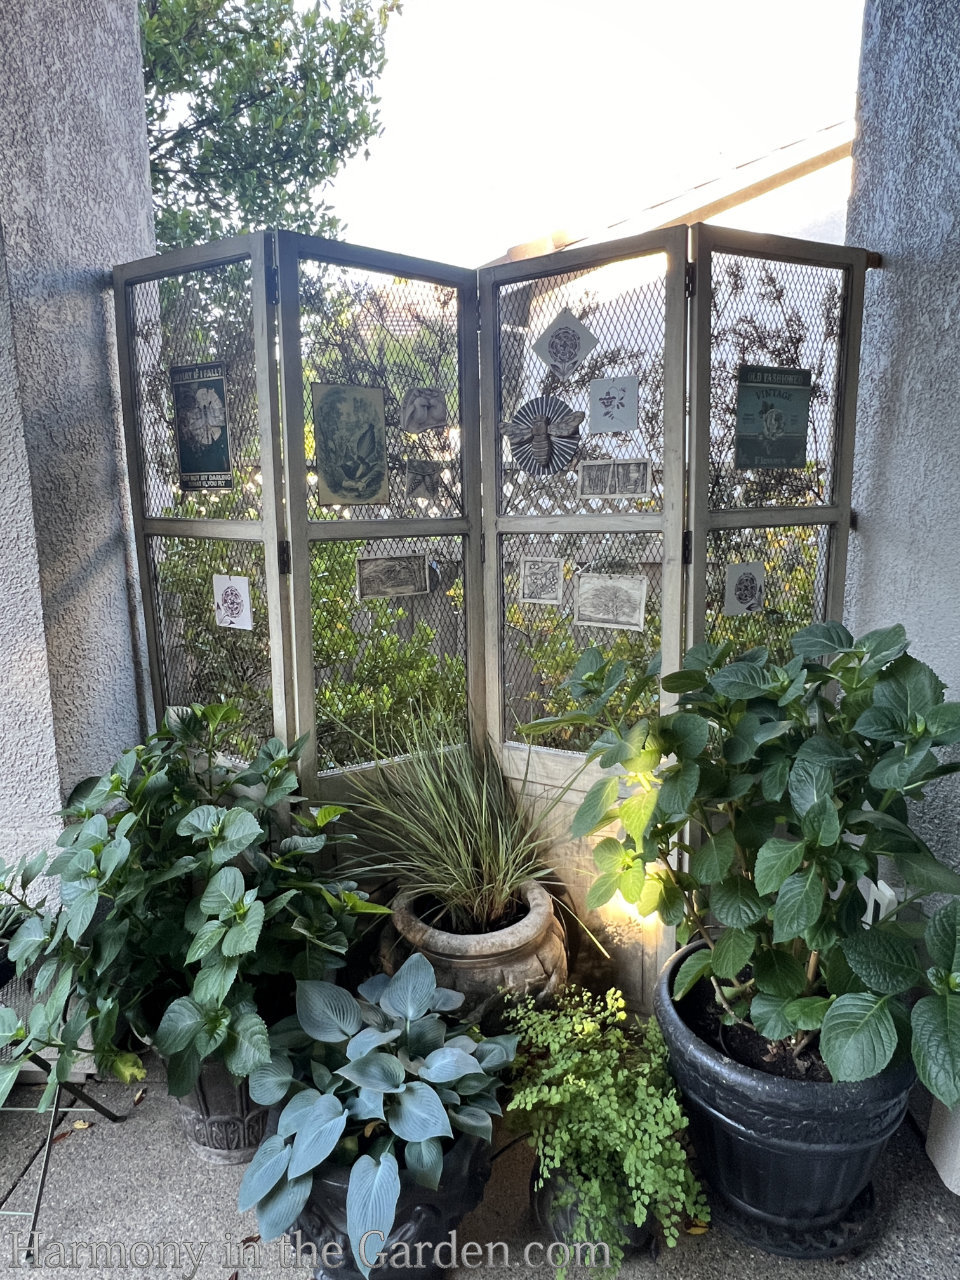
Moving pots onto a patio is the perfection solution for creating a portable garden.
This is precisely what my mother did when she moved into her new home with a much smaller garden.
A grouping of containers not only adds privacy but also allows her to enjoy more of her favorite plants.
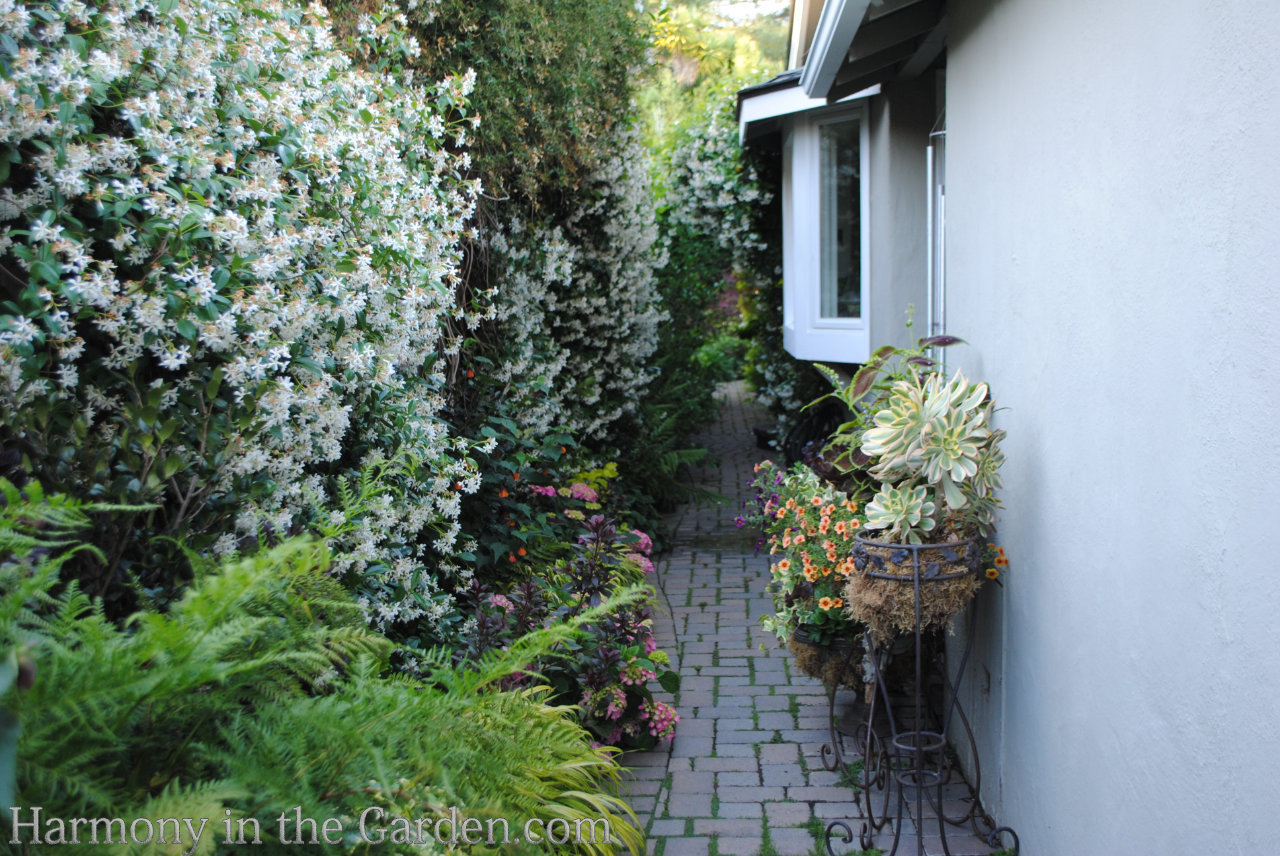
Here’s another example of how I created a portable garden on my previous home’s patio.
Since patios can be notoriously tight on space, rectangular shaped containers can be the perfect choice, as they don’t take up as much space as a round container.
In this photo, I used two rectangular containers (one placed on the ground and the other elevated.)
These not only soften a boring stucco wall but to add varying heights and levels of interest.
I have a large garden filled with a million plants, so I don’t have the time or energy to maintain intensely planted containers.
Of course, these types of containers are gorgeous, but they do require a lot of work with deadheading, pinching back, feeding, and then swapping out the spent flowers with a new season’s worth of blooms.
This is just one reason I love planting a container with a single plant (shrub, grass, or succulent) or as I say – my ‘One and Done’ containers.
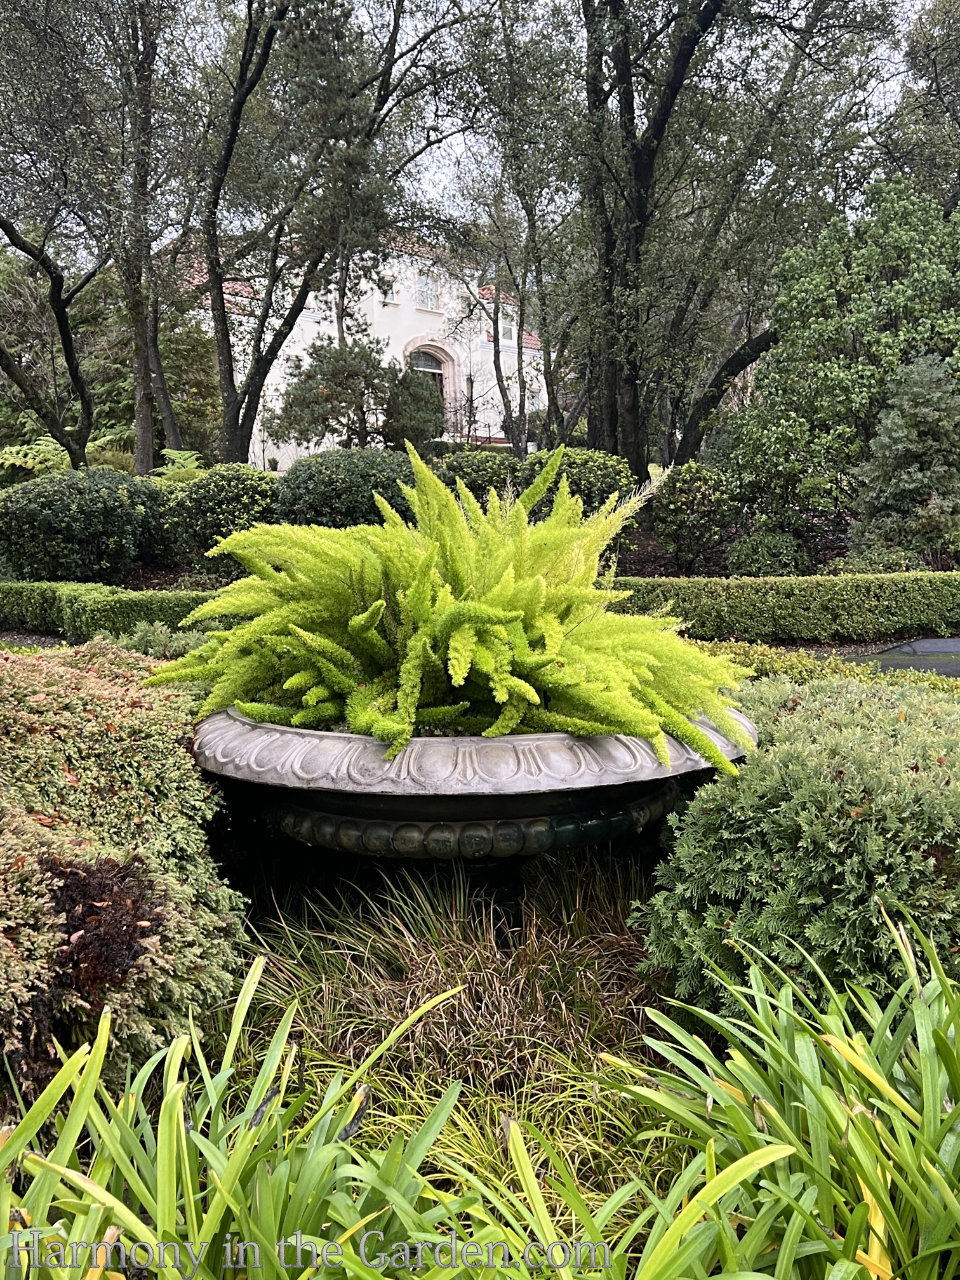
While walking around the neighborhood, I always appreciate this oversized container filled with a giant foxtail fern.
This homeowner’s garden is very low-maintenance, which makes this foxtail fern an ideal choice as it’s tough as old boots, fairly low-water, and evergreen.
This container looks great every day of the year.
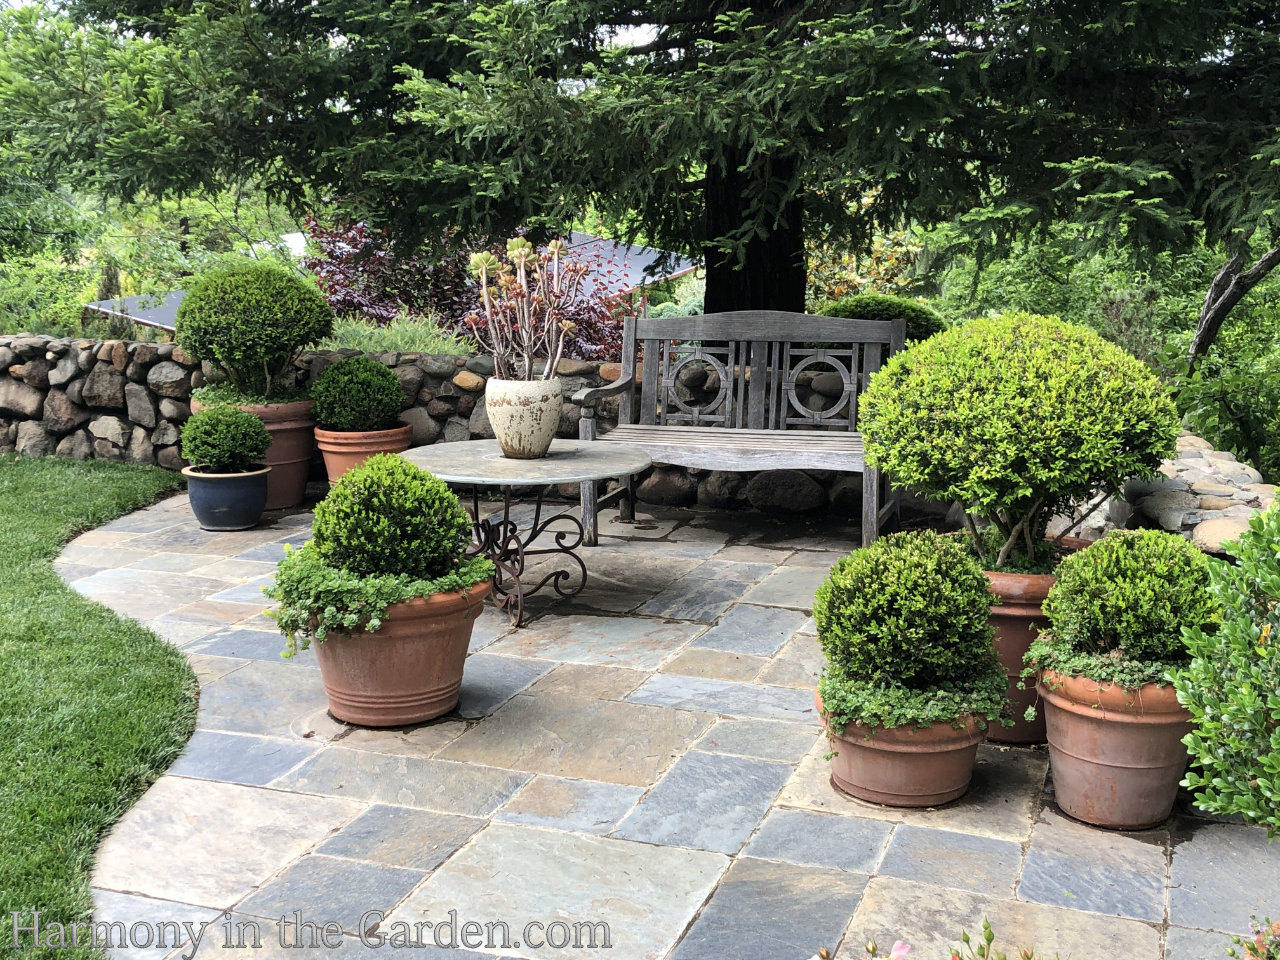
Here’s another example in the garden of Scott Paris (owner of High-Hand Nursery in Loomis.)
He’s got an amazing several-acre garden and a fantastic nursery, so you can imagine how short on time he is!
He has several groupings of terra cotta pots filled with evergreen, shaped boxwood shrubs.
Also, note the underplantings in these containers (a sedum, I believe) and how they add a soft, draping layer to some of the pots.
Going back to Lani Freymiller’s magical garden (see above examples) take a look at how she’s grouped several containers on her patio.
Most of these containers are planted with a single evergreen shrub, such as privets, pittosporum, and euonymus.
As previously mentioned, planting a container with evergreen plants not only ensures the container will look good throughout the year but is another way to reduce my workload in the garden.
And when choosing where to set these containers, I often place them within the garden bed.
Many people are surprised by this, but think about it – why not?
Who says containers should only live on patios, decks, or other hard and flat surfaces?
When placing in a garden bed, it’s a good idea to elevate the containers to prevent blocked drainage holes (you can use pot feet like these or even bits of broken brick.)
When surrounded by plants, the elevated container stops the eye, commands attention, and adds another dimension (via its height) to the garden bed.
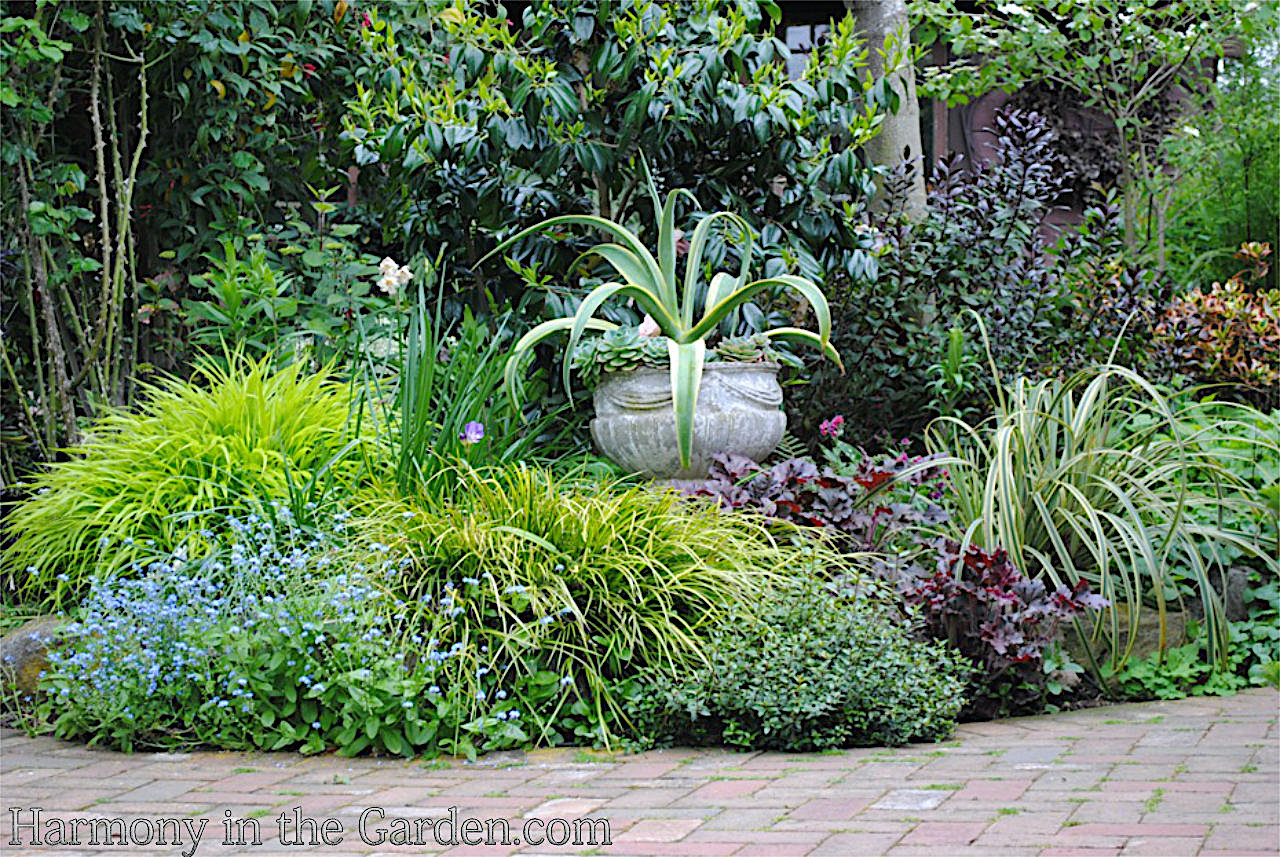
This is one of my favorite containers placed within my garden bed.
It’s an oversized pot planted with a fabulous weeping cercis ‘Ruby Falls.’
This native redbud has burgundy heart-shaped foliage in the spring which turns green in the summer, and then brilliant yellow and orange in the fall.
It’s slow-growing to 8′ x 4′ and gracefully develops weeping branches that resemble a waterfall.
It’s absolutely wonderful and if you’d like to read more about ‘Ruby Falls’ and my side yard makover, click here.
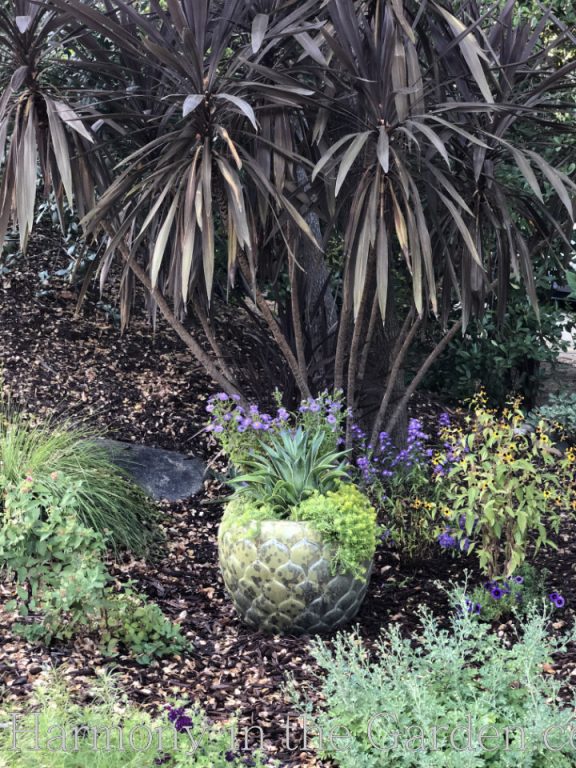
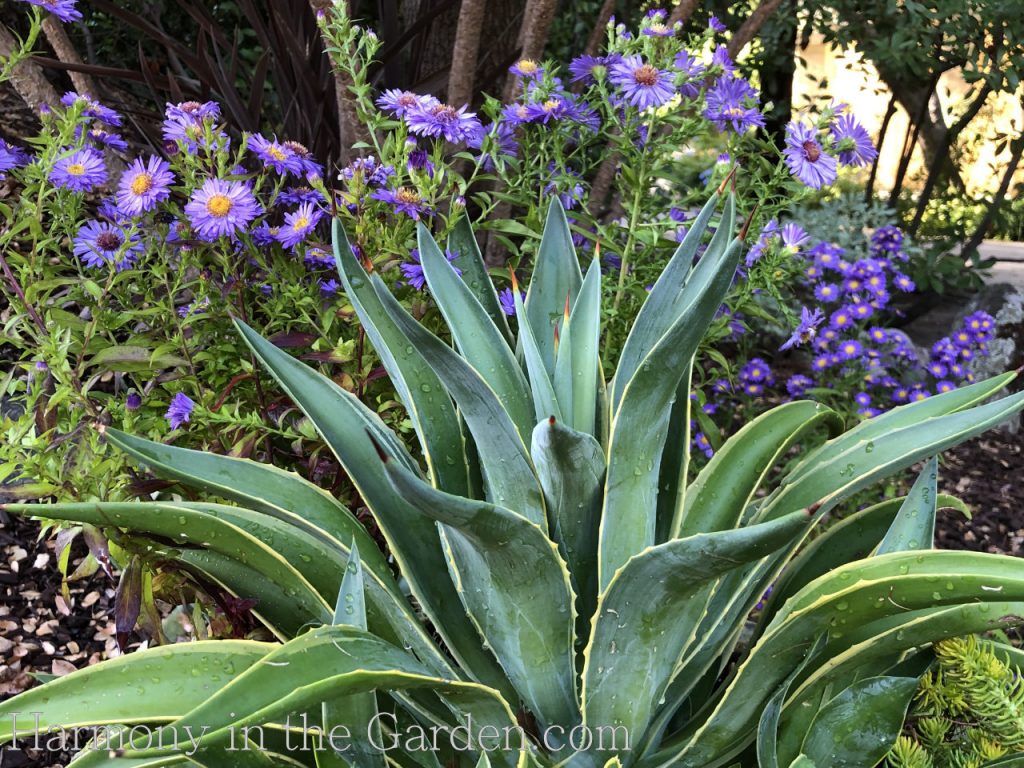
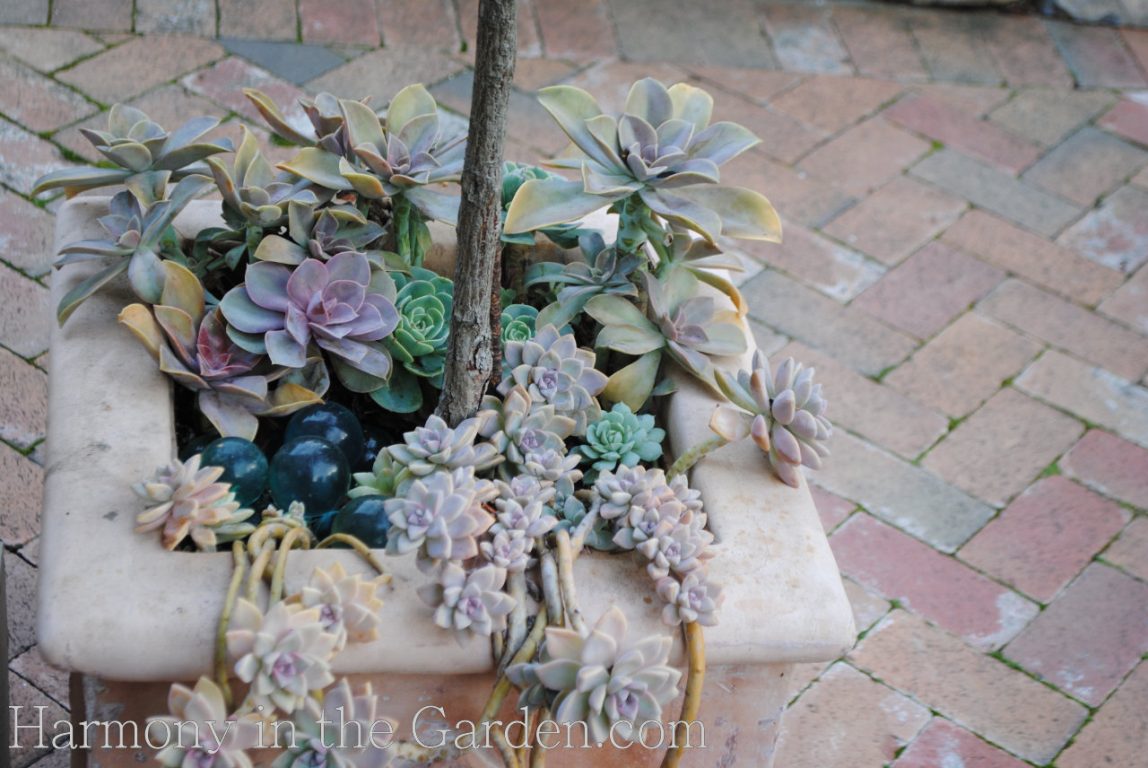
My daughter helped pick out this container a few years ago, loving how it looked like an artichoke.
When it came time to choose the plants, she wanted something resembling an artichoke, so we planted an agave in the center.
To mimic an artichoke’s purple flowers, we placed an aster‘ Barbados’ behind the agave. Cascading down the sides is sedum ‘Angelina.’
While the aster is deciduous, the agave and sedum are evergreen, which ensures the container looks good year-round.
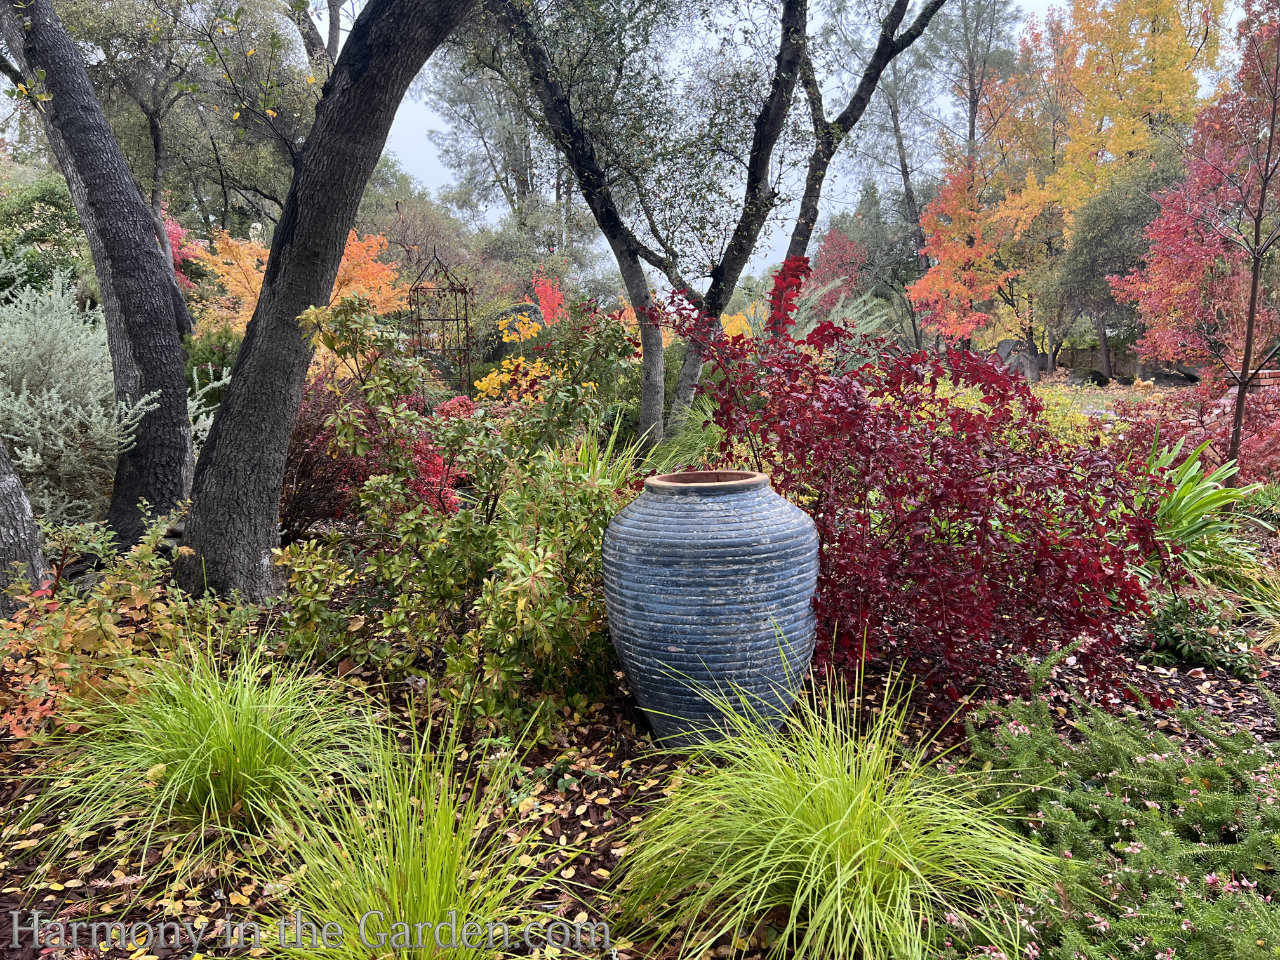
Placing containers within a garden bed naturally creates a focal point, particularly when the container is unique.
However, not all standout containers need to be planted.
In fact, when a container is particularly striking, it can be more visually appealing when left empty, as this allows the focus to remain on the container itself.
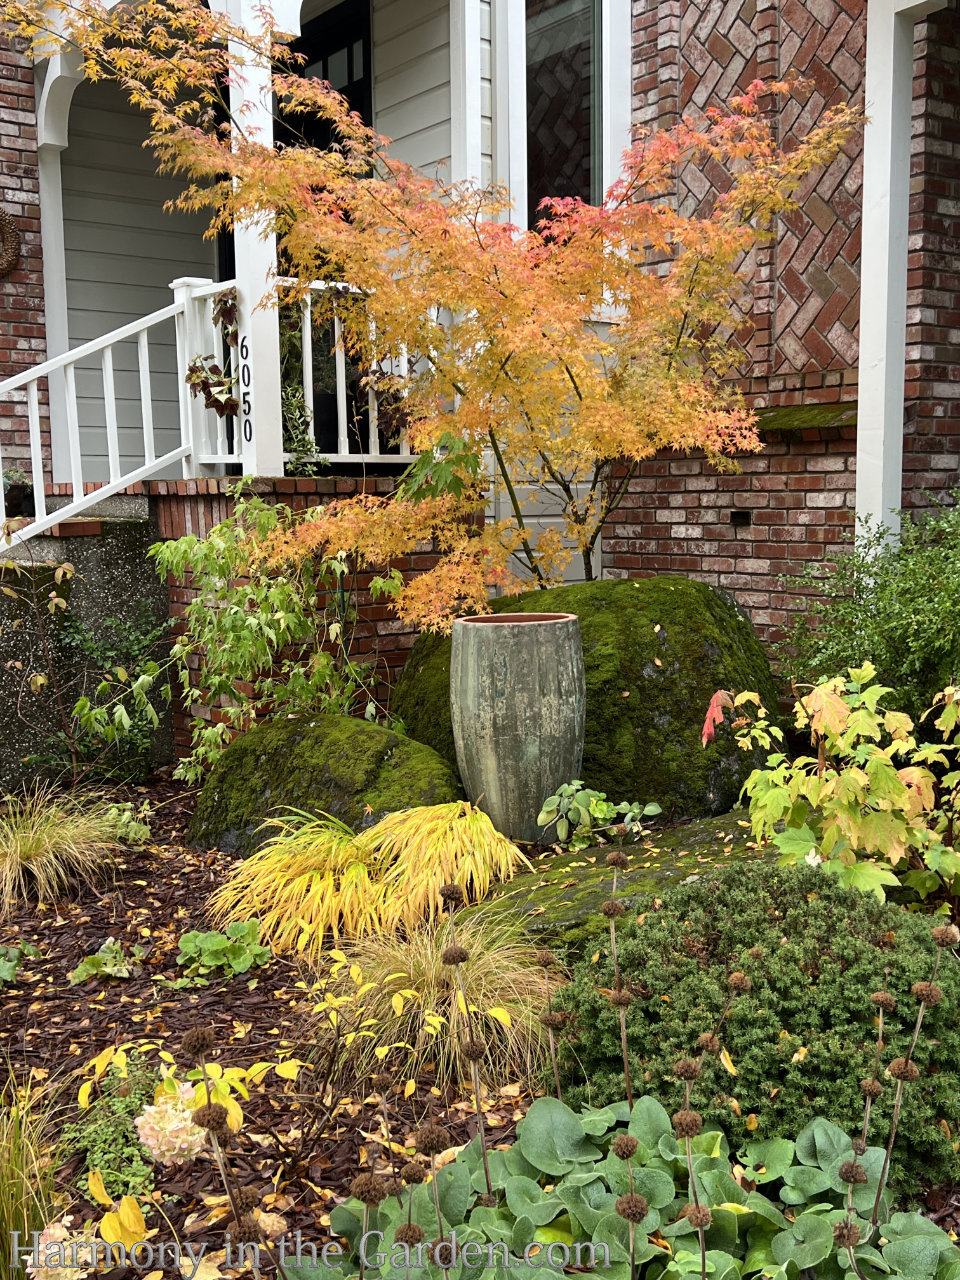
In this part of my garden, I have an oversized urn from Plantatorum that not only adds a stunning shade of blue among my fall colors, but even when the garden is bare in winter, the container remains a focal point.
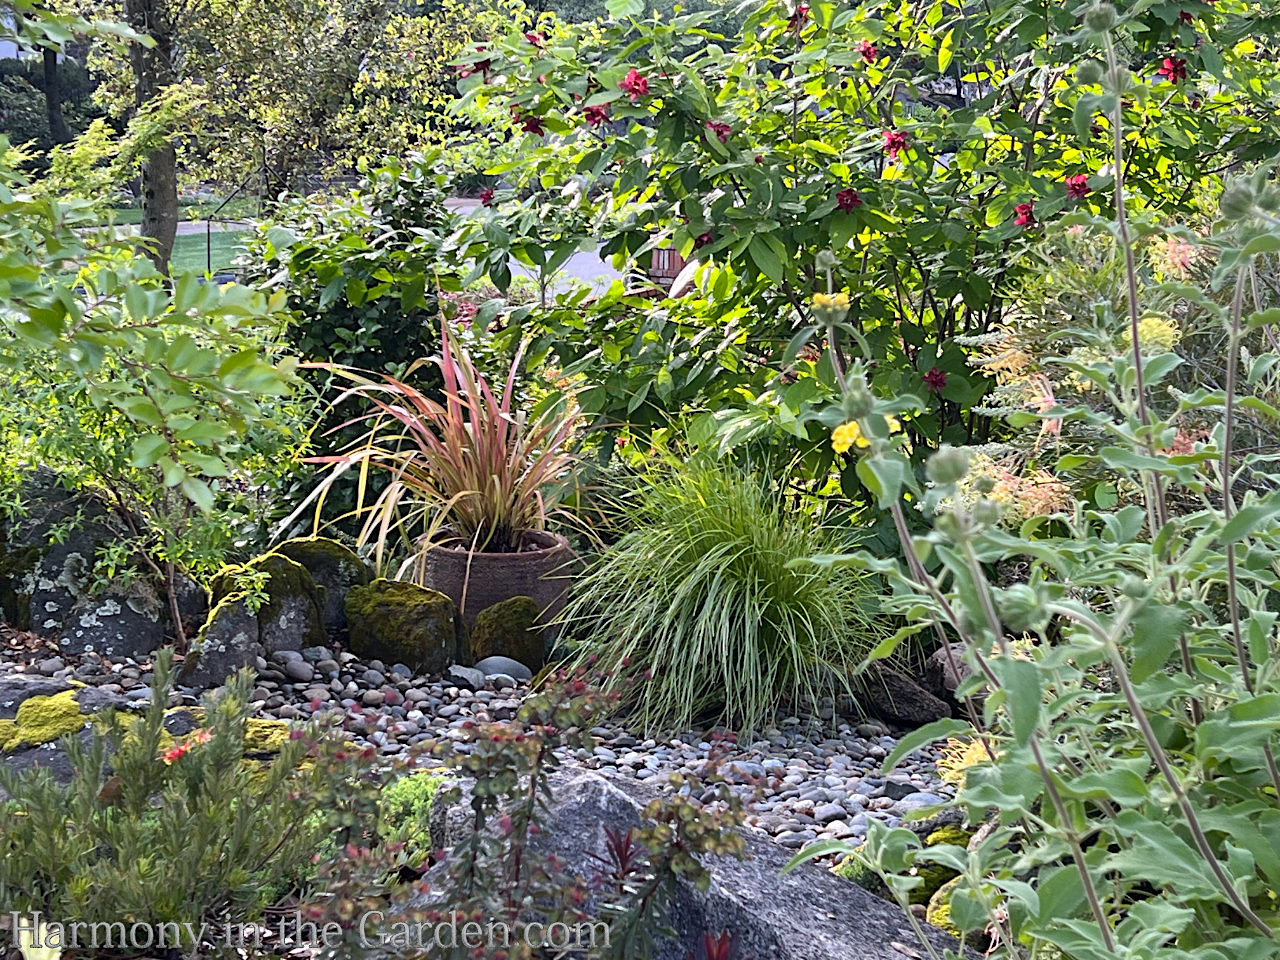
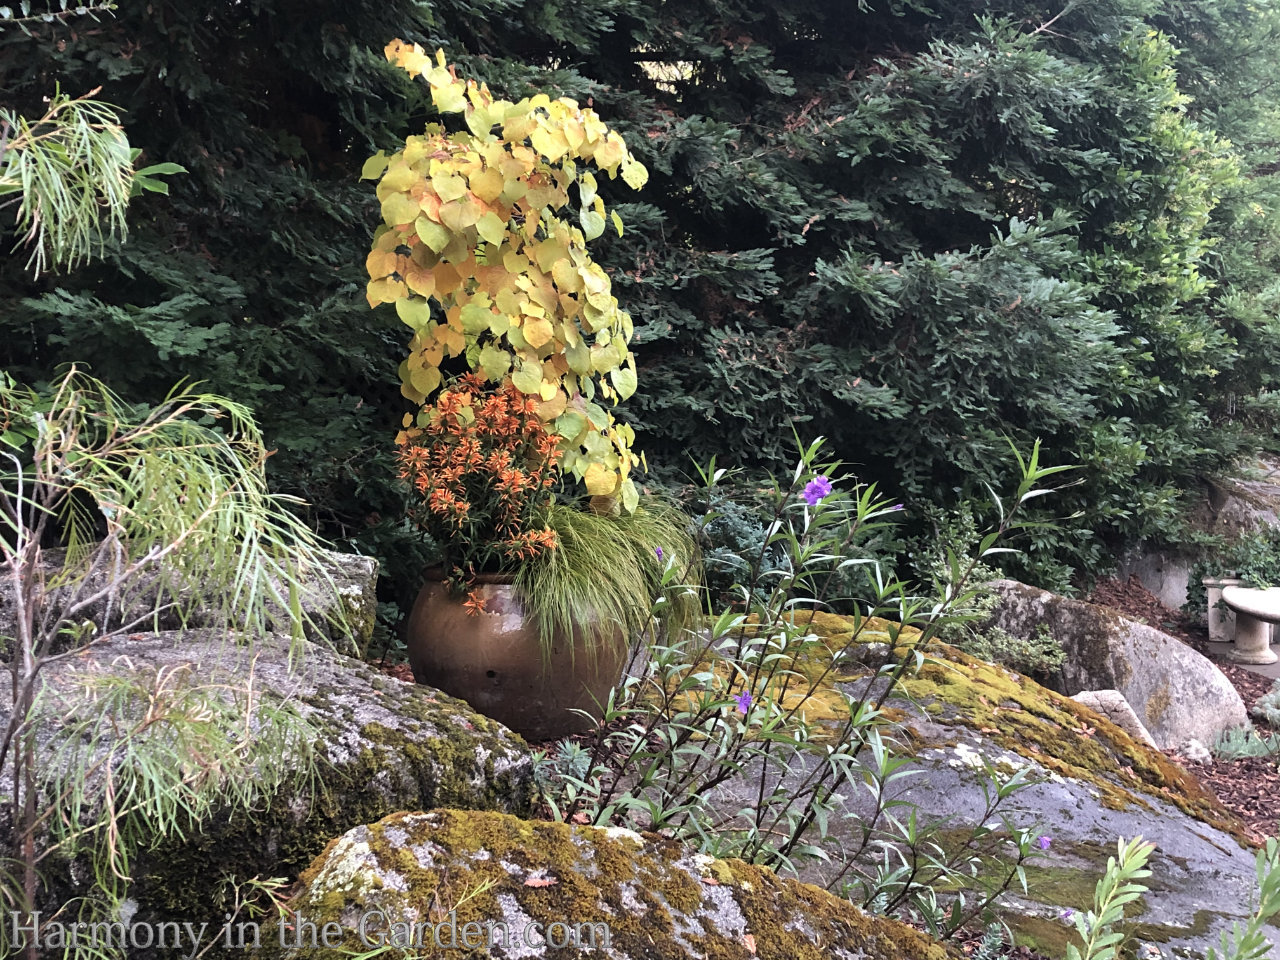
This tall and narrow ‘Del Meson’ container, also from Plantatorum, perfectly nestles among the gigantic, immovable granite boulders.
It’s next to impossible to plant anything among these boulders, as the plant’s roots have very little space to grow.
This narrow container is the perfect solution! It’ size is proportional to its surroundings, helping it to seamlessly blend with the boulders.
If you’d like to learn more about proportion and scale, and the difference it makes in a garden, click here.
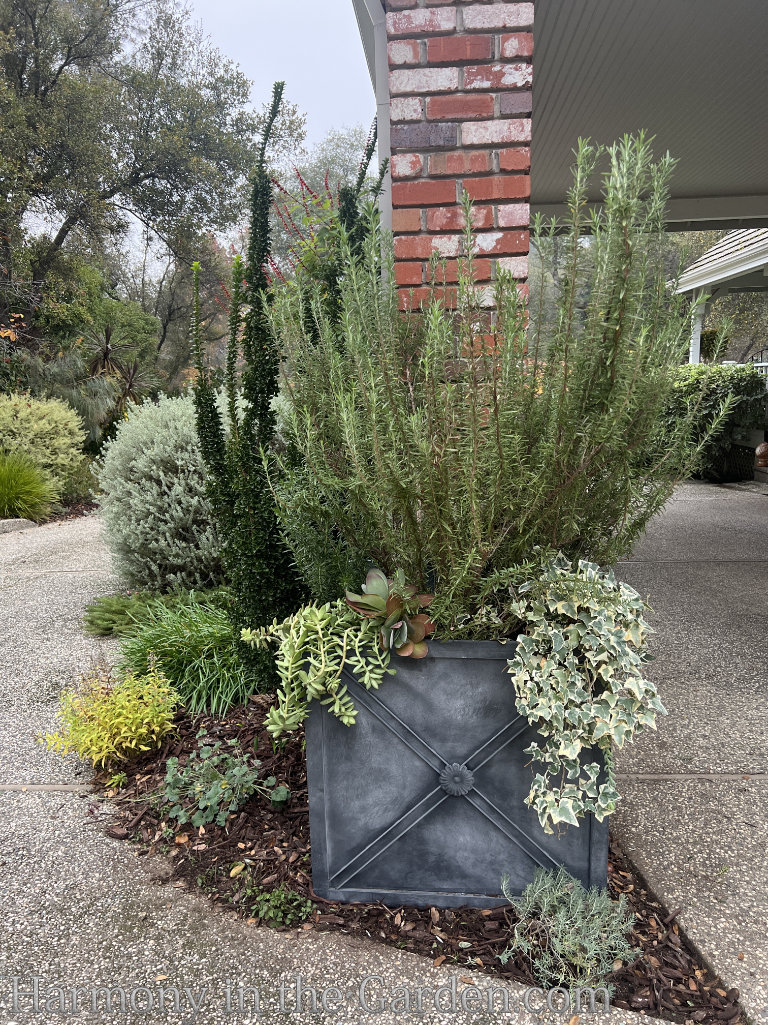
I’ve been looking for a statement piece for this prominent area of my front drive, whose height and width would be in proportion to the surrounding area.
This incredible Regency Zinc Planter from Agriframes is perfect!
Crafted from heavy-duty steel, and coated with zinc, it will slowly weather into a beautiful soft gray patina with each passing year.
Planted with a tough, evergreen rosemary ‘Tuscan Blue’, and succulents that drape over the edge will ensure it looks great throughout the year.
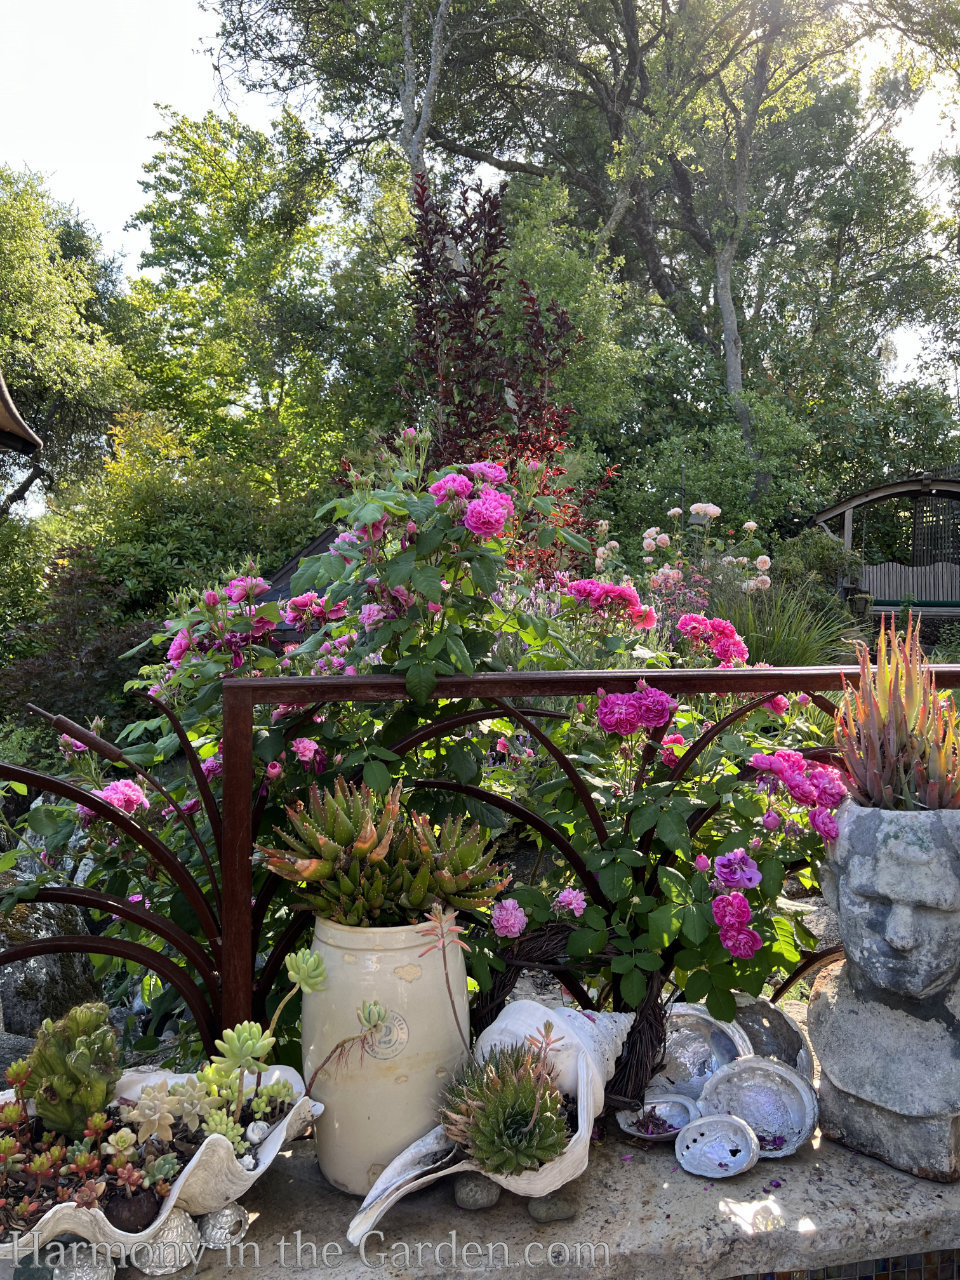
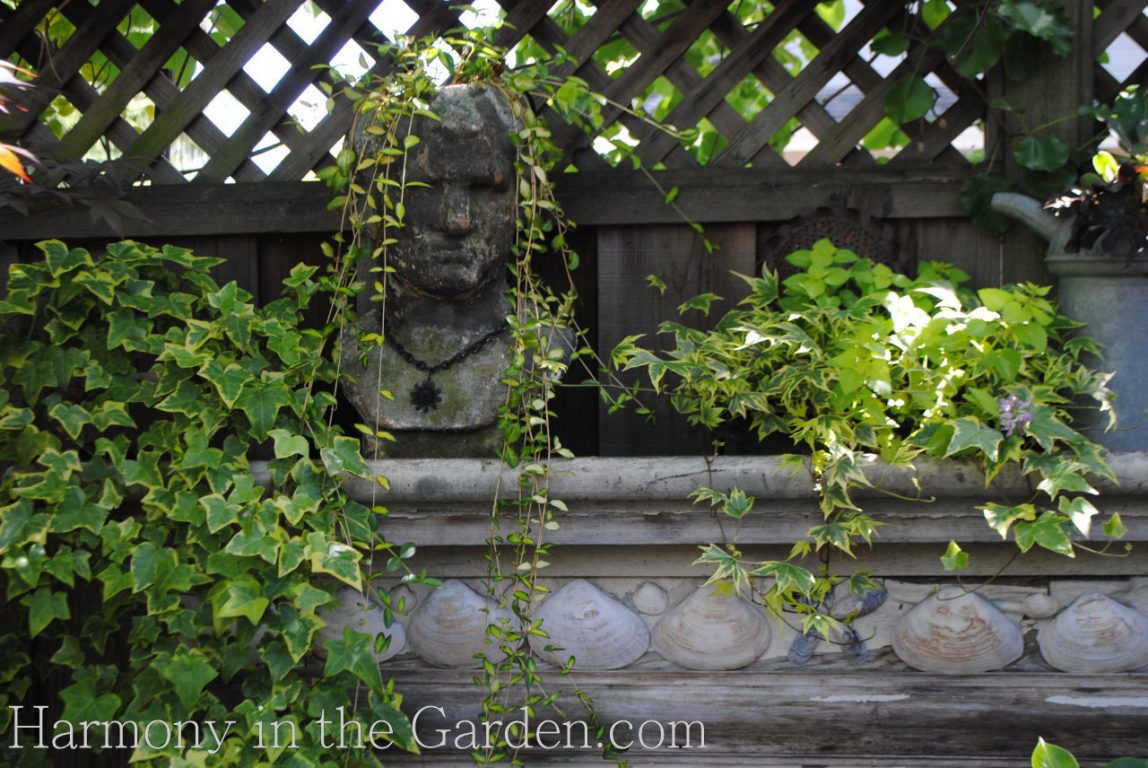
I always like to add a little humor and personality in the garden, and some of my containers do exactly that.
In one part of my garden, I have shells planted with succulents that mingle with a cracked antique crock and the nearby head.
That head, in fact, used to live on the fireplace mantle from my last garden (click here to read how I rescued the fireplace mantle from a dumpster.)
While I didn’t take the mantle with me, I DID take the head!
Now he lives on the ledge of my outdoor BBQ, with a sunburned aloe for his hair.
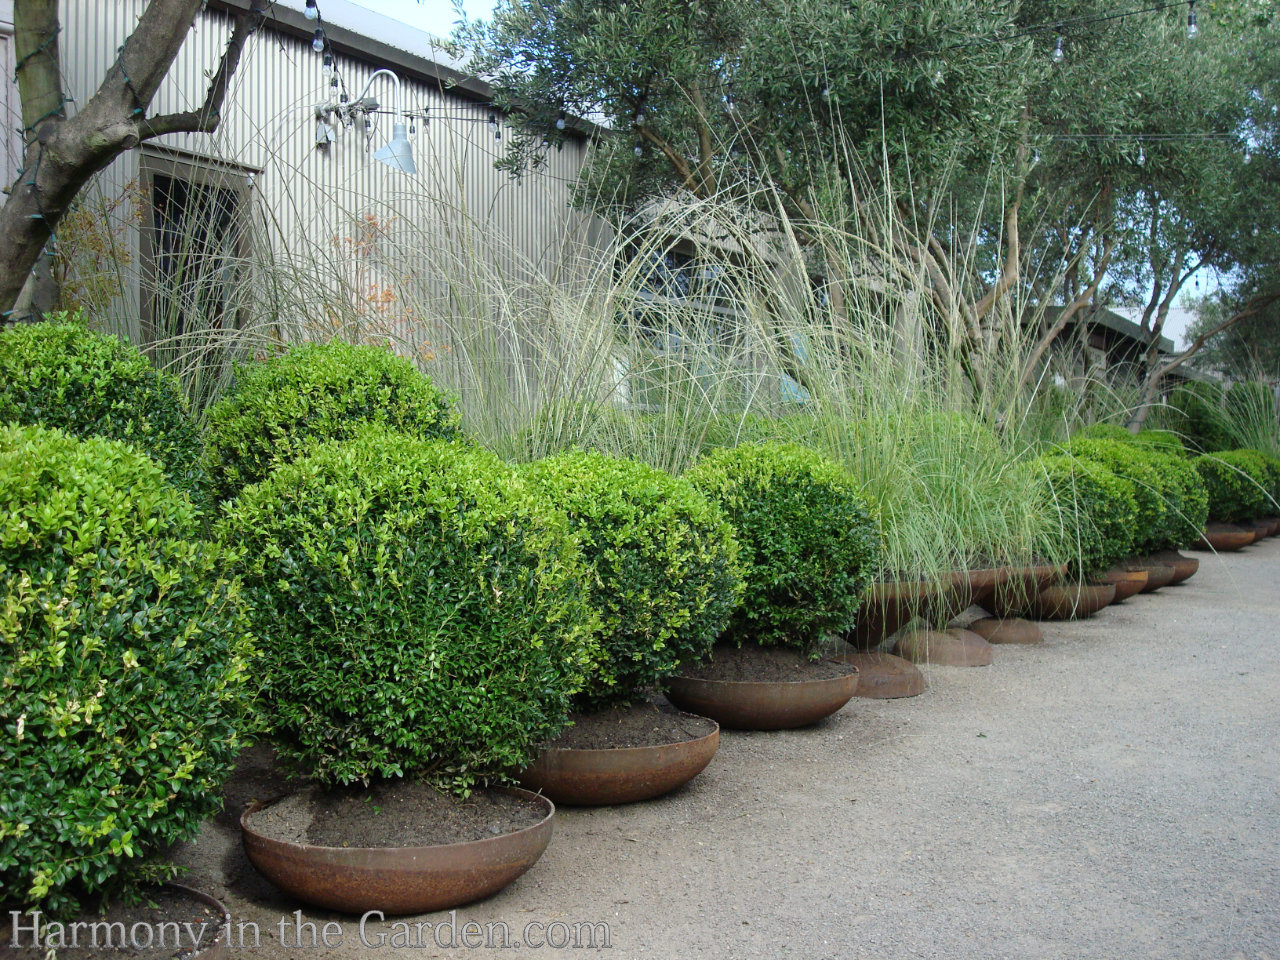
I saw this garden years ago at Cornerstone’s ‘Late Show’ Gardens.
This garden was created by Mike Lucas and Gary Ratway, using repurposed propane tank heads as planters for formally clipped boxwood balls.
If you’re interested in knowing where to source scrap metal such as this, here’s an interesting interview.
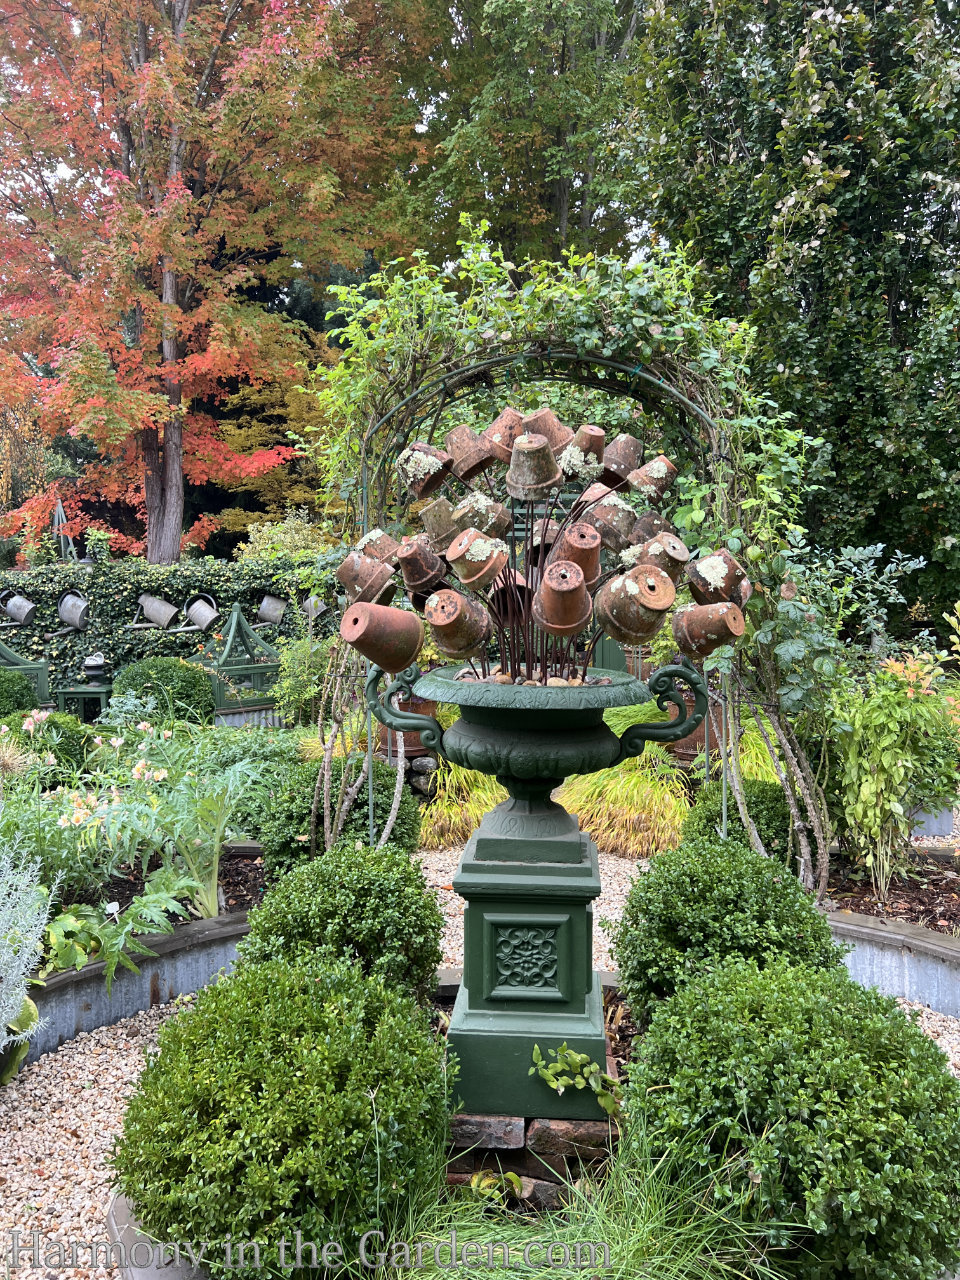
This is one of my favorite examples of showcasing creativity and personality!
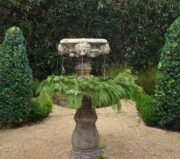
It’s Freeland Tanner’s interpretation of a classical European urn.
(if you’d like to see this garden in person, why not join us in one of our unforgettable two-day immersive garden workshops?)
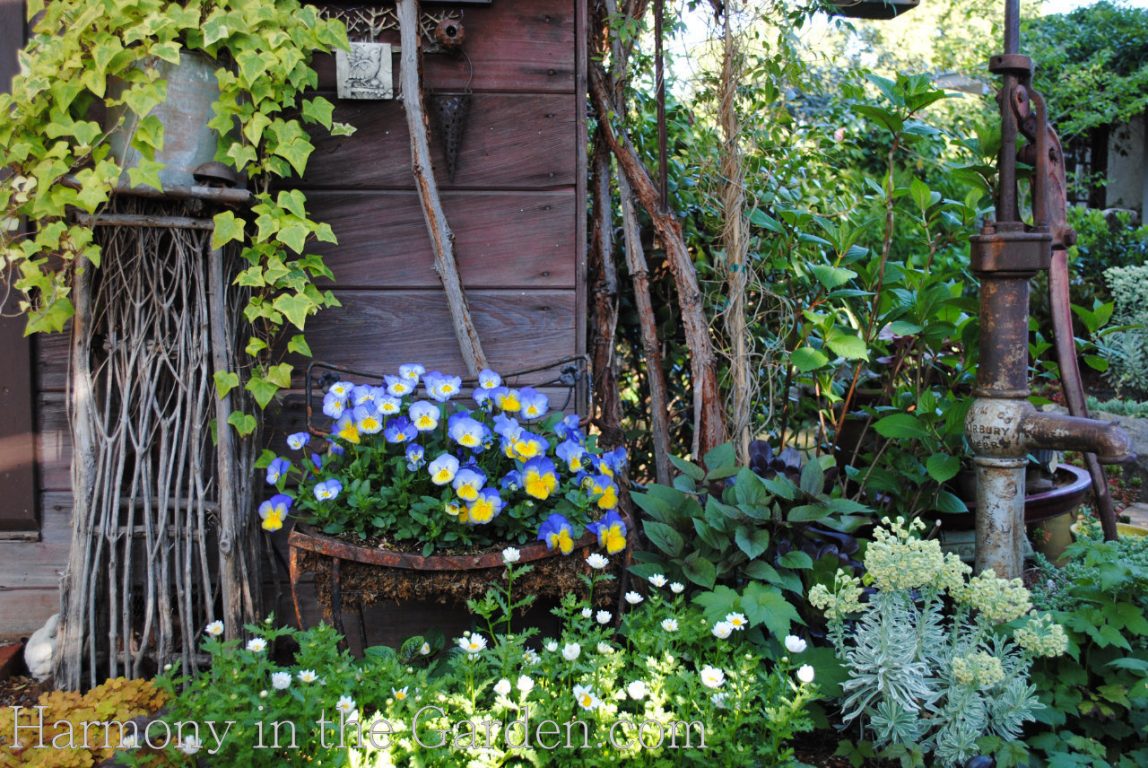
Most anything can be repurposed as a planter with a little hard work and some creativity.
This planted chair was one of my favorite additions to my garden (click here to watch a video showing how I created it.)
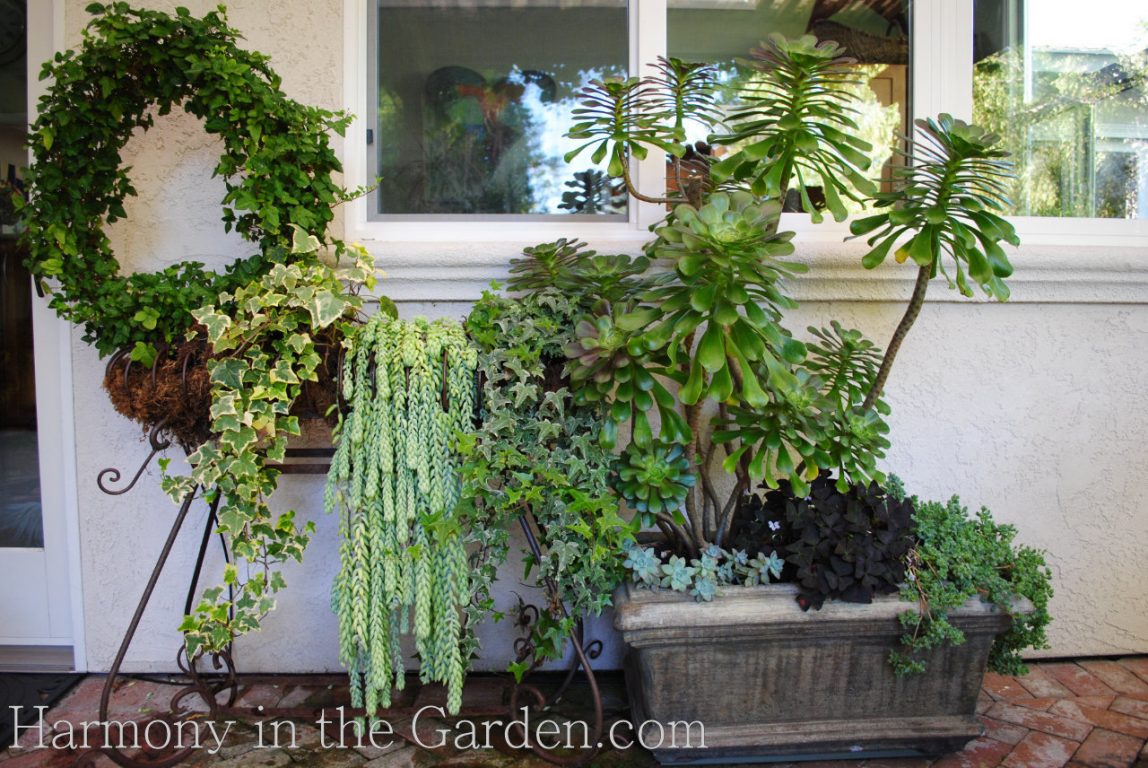
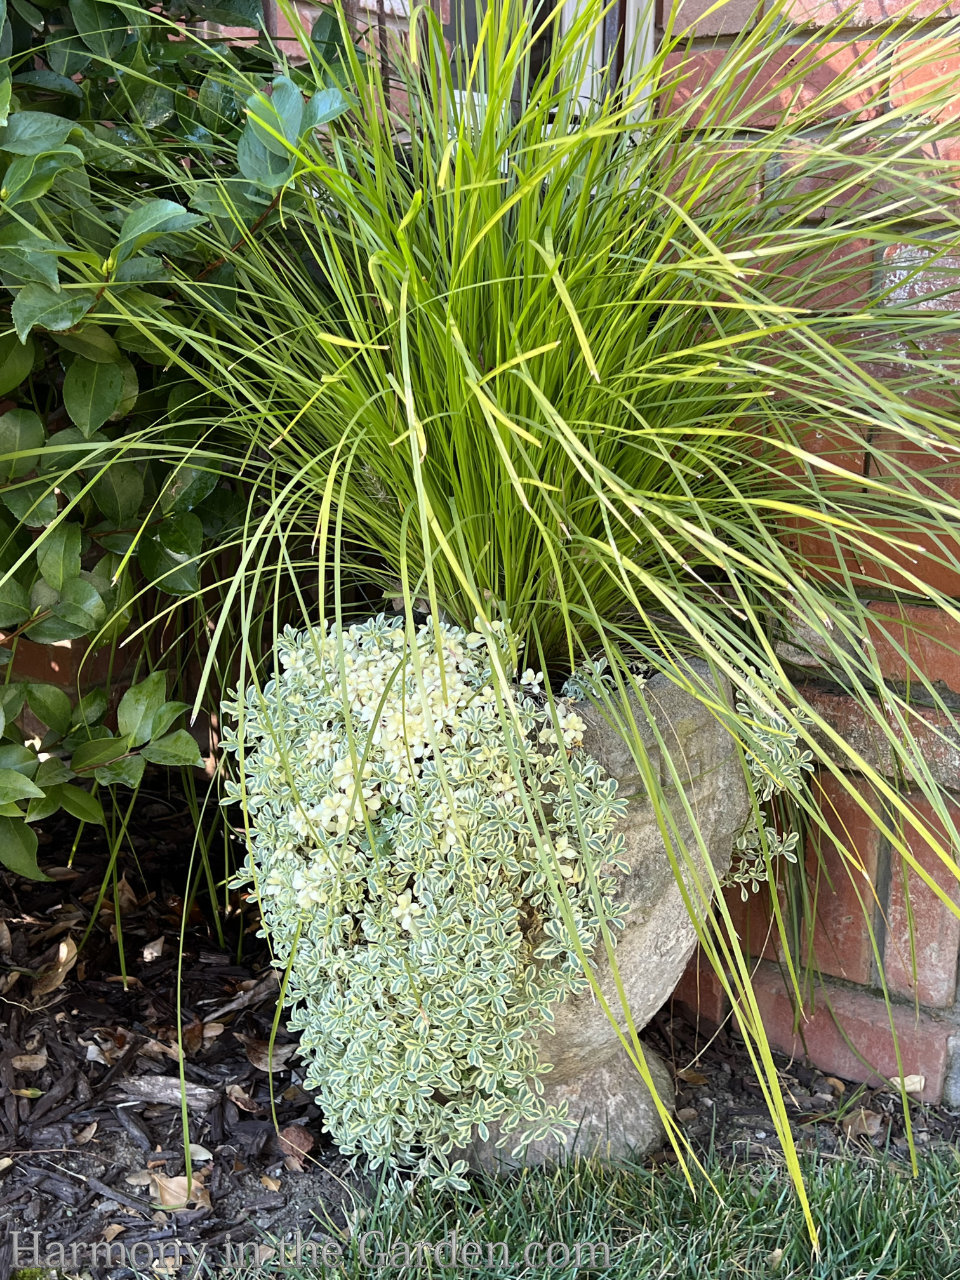
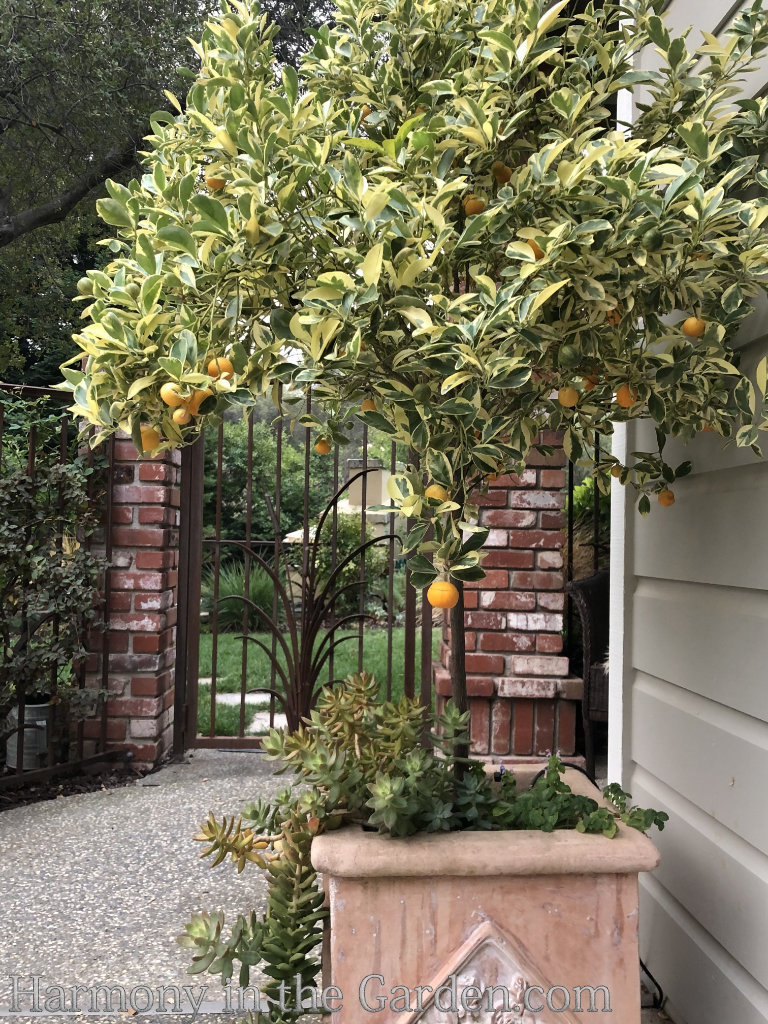
I’ve noticed that some gardeners don’t take full advantage of the entire container. I’m referring to the layer at the top of the soil, which is ripe for planting low-growing plants (which I refer to as ‘underplantings.’)
This is a fantastic way to add yet another layer of interest to a container, especially if the main plant has a leggy or bare stem.
Plants that live in a confined space are naturally going to use up more nutrients than those planted in the ground.
They really do need to be fed quite often, with the general advice being once a month.
I prefer using an organic fertilizer, like this one (a little goes a LONG way with this product).
Or, if you’re a little forgetful with feeding (like I am!) you can still have healthy plants by using a slow-release fertilizer, such as this one by Burpee.
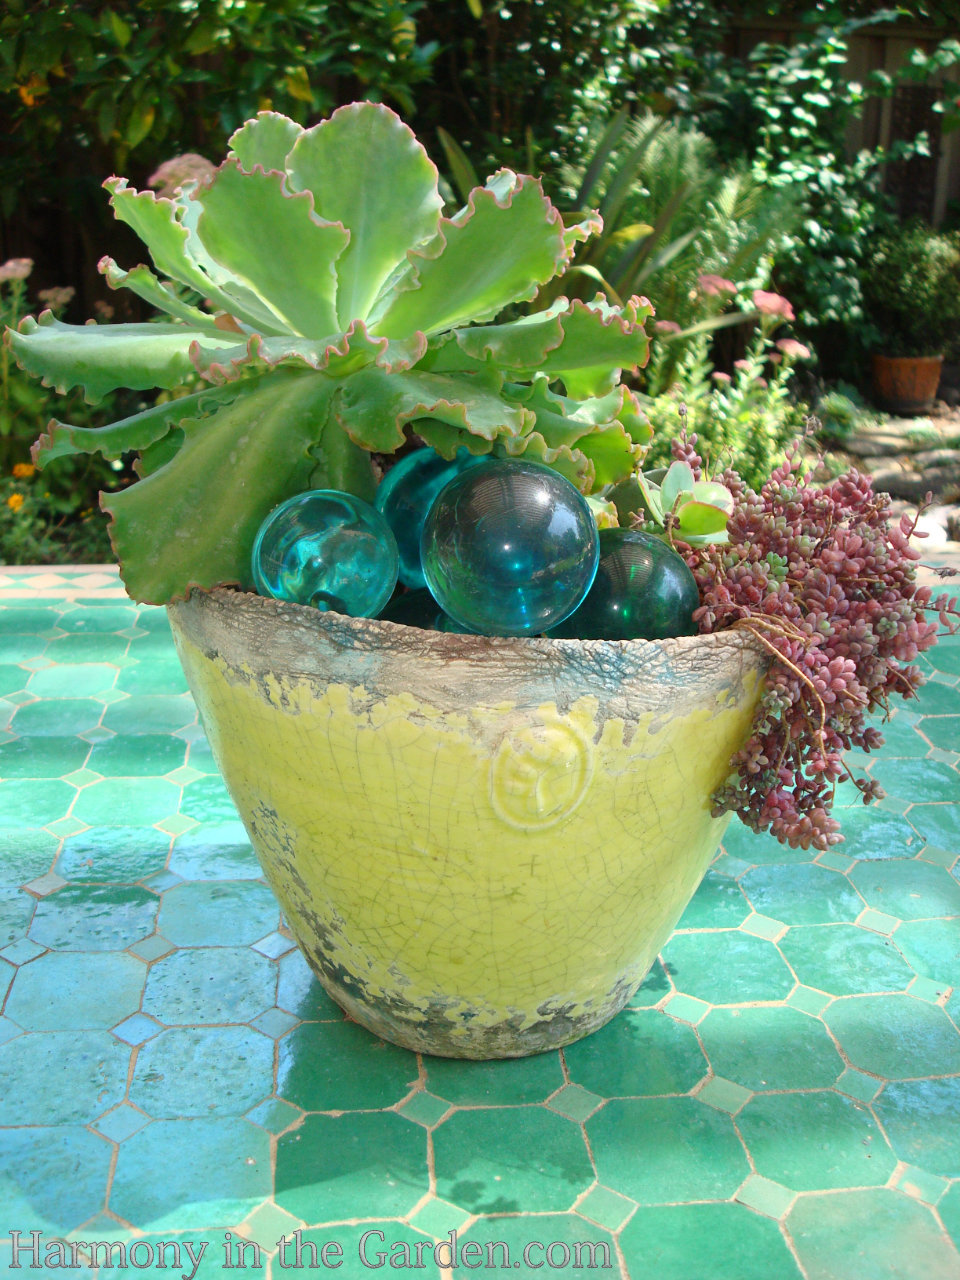
In addition to the underplantings in your containers, don’t forget to add a little bling!
Just about anything counts, like this tumbled glass that I added to my succulent container.
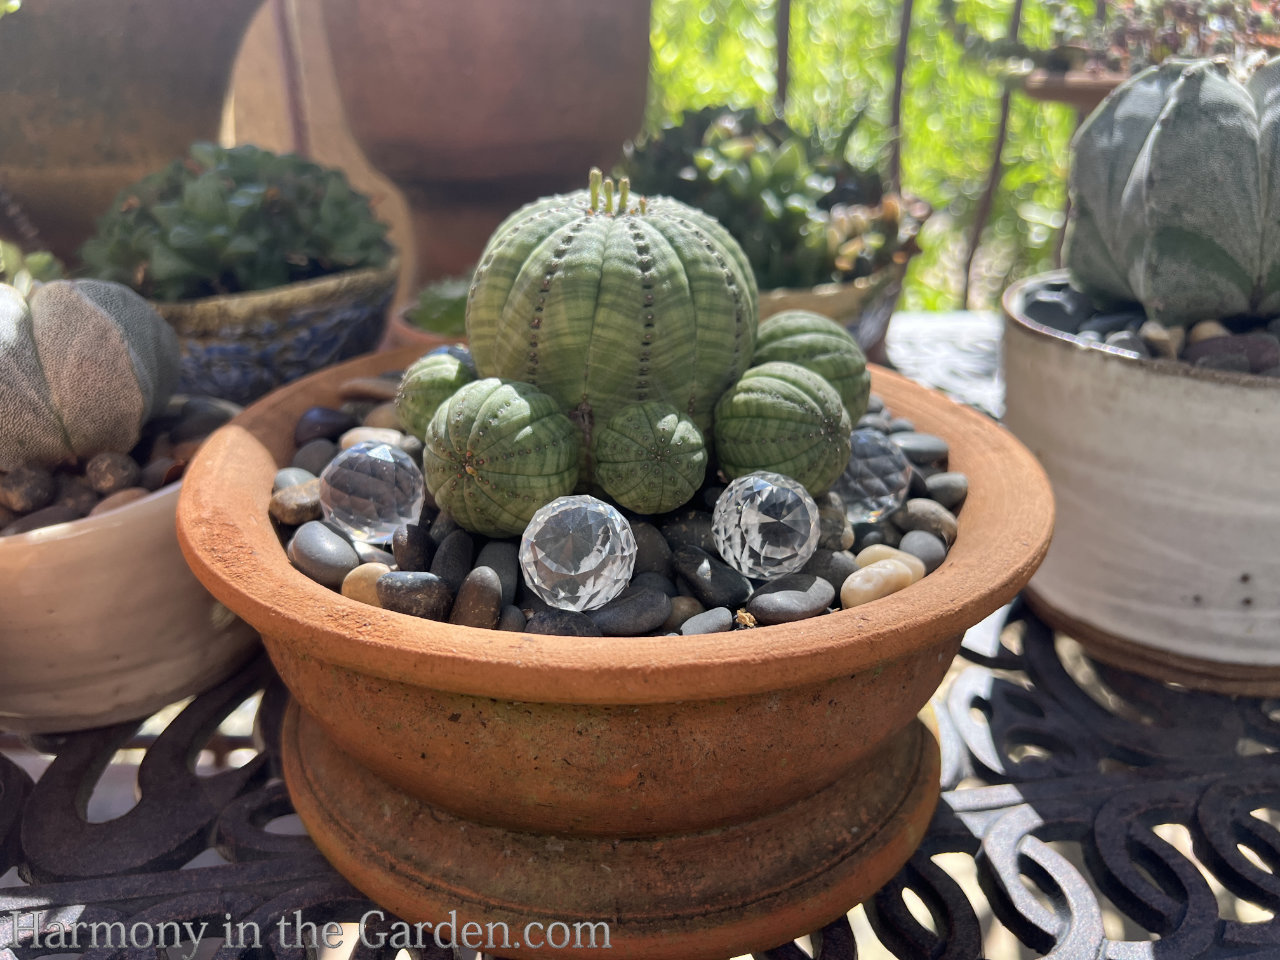
I love these super cute, inexpensive little crystal sun-catcher balls that I’ve used to echo the ball-shape of my euphorbia obesa.
Plus, when the sunshine hits these crystals just right, little rainbows appear adding even more sparkle.
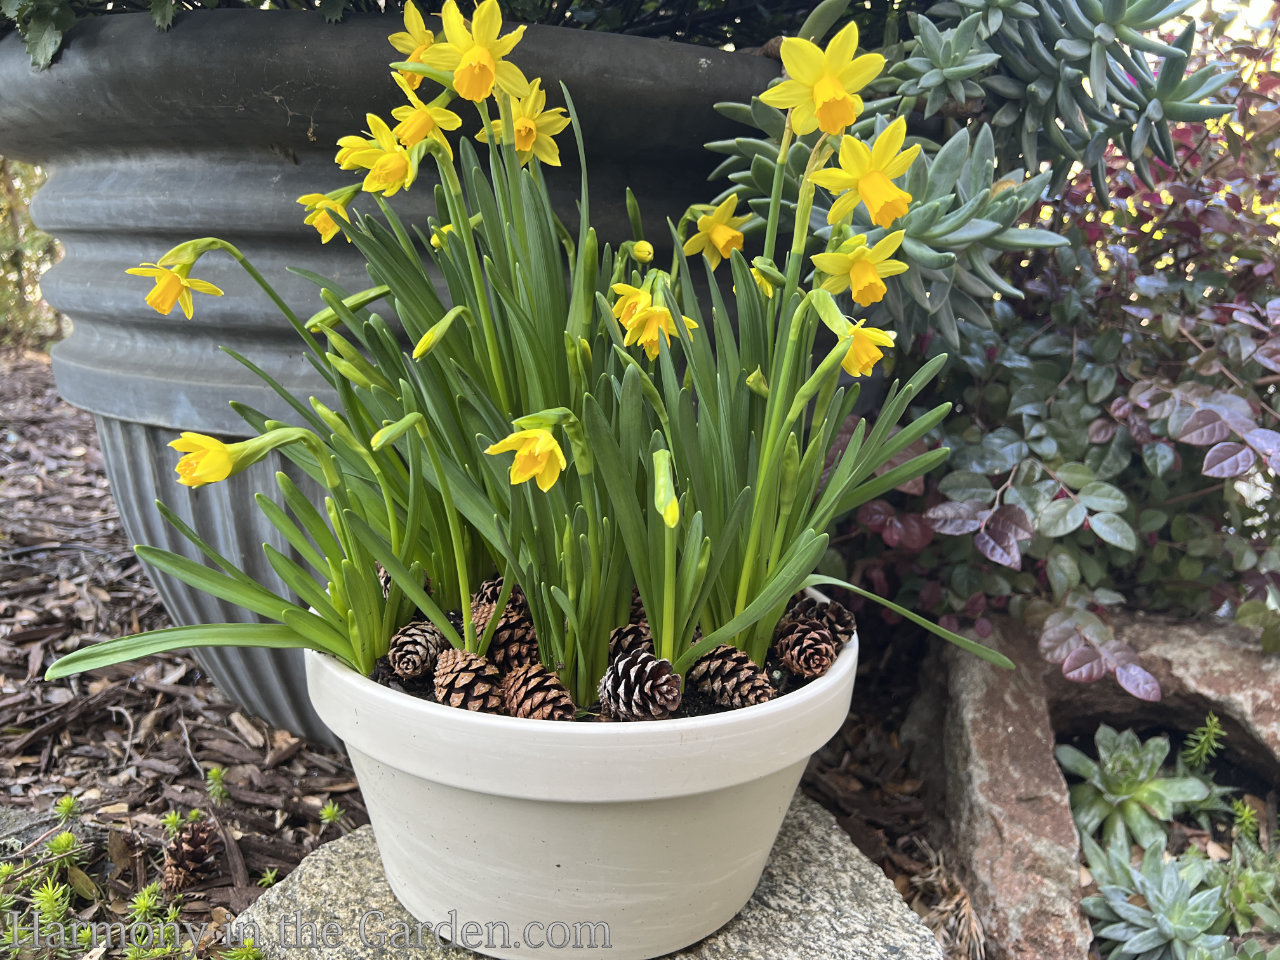
Small pinecones gathered in the fall not only prevent the squirrels from wreaking havoc in my containers, but add a textural and colorful contrast.
A little bling compliments of Mother Nature!
Another gift from Mother Nature is clumps of moss, which I pick off of an old shed roof and use as mulch (similar to the pinecones, above.)
If loosely placed on top of bulbs, they can easily push through the moss as they begin growing.
And finally, years ago while thrifting, I found one of those resin grape clusters that were popular decor in the 60’s.
My husband couldn’t figure out why I’d buy it, but once I got home and started deconstructing the grapes, he quickly understood.
Now I had lots of colorful resin ‘bling’ to add to my containers!
I’ve had these balls for over a decade and they’re tough as nails – never fading, scratching or breaking!
Okay, this post is long enough – time to sign off!
I hope I’ve given you some container inspiration and ideas on how to use them in your garden.
And, if you’re looking for even more container inspiration and advice, take a look at the links below.
I thouroughly enjoyed your article, and learned a great deal. My daughter and I are about to try container gardening in part of the back yard under a live oak. Grass will not grow there, so…we are hoping!
Thank you, Vicki, and best of luck with your new container garden!
Great post and beautiful photos as always. And it’s nice to see that I’m not the only one who likes containers with just one type of plant in them. I’ve actually never been a big container person, but I recently added a wood whiskey barrel pot with just a red geranium in it. I like it because it’s such a classic look and is what my grandma had in her backyard and makes me think of visiting her and the area she lived.
Thanks, Danny! Don’t you love those whisky/wine barrels? We use them all the time at Tahoe where it’s so difficult to plant in the ground due to nightmarish roots and rocky soil. Yours sounds like it’s not only beautiful but the memories it evokes is the icing on the cake.
Well, as usual I’m late in reading your blog. I think it’s because I know it will be jam packed, in a good way, with lovely pictures and great garden information. Love it all. And after reading your comment to Gigi Godfrey I followed the link from her name and discovered wonderful paintings. Sigh, one more place to go but not tonight. I’ll leaver her page up and look at it Sunday.
Hi Barbara, so nice to hear from you and wow – what a sweet comment. Thank you for making my day! 🙂 I’m so glad you’ve explored Gigi’s paintings, aren’t they wonderful? I’m so lucky to have two of them, and not only are they beautiful but Gigi is such an awesome person, as well. Spring is almost here – I hope yours is a glorious one!
Your containers are absolutely stunning and the visual impact is amazing! Containers have always been a challenge for me and the solutions you’ve shared are priceless!
Thank you. Joy
Lamorinda Garden Club
Hi Joy, thank you so much and I’m glad you found a few solutions here on how to use them in your garden!
As always, I love getting your blogs. Can you please give me your source for the Australian Wooly Bush? It is the perfect plant for a boring area in my garden.
Hi Judy, Thanks so much and I’m so happy you enjoy my blog posts! I found both of my Australian Wooly Bush plants (1-gallon, too!) at our local Green Acres. I’ve also seen them in a few nurseries in San Rafael so it seems they’re becoming a little more available than they have been in the past. They’re pretty wonderful plants, so textural and interestingly shaped – just give them a little protection from the blistering sun and frost.
These are beautiful garden photographs! I love your blog, your helpful advice, but I just realized today, looking at these photos, that you are an amazing artist. Each photograph might well be a painting, with the garden as your canvas. It is remarkable, with your artist’s eye and your knowledge of plants and gardening, how you create living fine art. It is also wonderful that you are willing to share it. Thank you!
Carol, what a lovely thing to say! I’m so glad you’re enjoying my blog and photos. 🙂 I really do believe we’re all artists in our own way, whether it’s with traditional mediums, cooking, plants, or even working with computers (you should the magic my husband creates with his coding – ha!!) I hope your garden has fared well through the summer and that it’s nestling down now, getting ready for winter. Thank you, again, for making my morning. xoxoxo
Hello Rebecca,
Beautiful and inspirational container plantings! I have a question reg the patio planting (one rectangle planter on the ground, and another raised on legs, appears to be wrought iron). There is a large ivy growing in a wreath-like shape to the left of the photo. Is they ivy growing out of the raised planter? If so, how did you train it to grow in a circle? Is there a wire support underneath the ivy? Is it attached to the wall or somehow attached to the planter? Also, do you water by hand or use a drip irrigation system? I live in Folsom, so I know how very disciplined a gardener must be to water by hand…missing even one day in the summer =s dead plants!
Thanks for the kind words, Cheri! Yes, that one is wrought iron and the ivy is actually a topiary that I was given on my 30th birthday (many, many moons ago!) It’s a raised planter with several containers in it, the ivy being one of them. If I rely on myself to keep my pots watered, they’d be in a sad state for sure (especially with this heat!) so I have them hooked up to irrigation. I love the wire planter, as I can discreetly run a 1/4″ tube up the leg and into the pots. I’ll then sometimes place pots below the raised one, so they can take advantage of the extra water that runs through. Don’t want to waste a single drop! 🙂
Love all your pots, fell in love with your pomegranate in your Los Altos home, the color is wonderful. I am an addict for succulents in pots and always love to see your combinations., you have such a nice collection of pots.
Thanks so much, Susan! That pomegranate has been with me for years now – I wish more people could easily find them (I’ve yet to ever see one in the nursery since!) Succulents are certainly some of the most forgiving plants of all, aren’t they?
I enjoyed your post, you are so creative, you always inspire me. The garden is in full bloom here on Bainbridge Island–everything beautiful! Hope to see you soon.
Hi Gigi – Thanks so much! And WOW WOW WOW – your latest blog post and GORGEOUS paintings are amazing. You are so dang talented, my friend!!! Glad your garden is thriving – send more pics when you can! xoxoxo
As always wonderful and inspirational ideas. I always get great ideas including what to do with my adorable cement bunny with a too small for almost anything I could think of empty bag over his shoulder. Sedums will do it and cascade and look wonderful all year. I have lots of succulents but in the Northwest they would not all winter over–I an lucky to be able to put them inside my sun-room for the winter and rainy season. I especially enjoy your “findings” made into garden art. Keep up your wonderful work.
Thanks so much, Joan, and I’m so glad your bunny now has something to carry in his bag! There’s so many sedums out there, ‘Angelina’ is a favorite with its bright and fresh green color. You could tuck a teeny tiny easter egg in there, too. Send a pic when you’ve planted it – I’d love to see! 🙂
I was just sent your posting by a friend. Please add me to your email list. Thanks!!
Hi Gail – nice to ‘meet’ you, and I’m happy to add you to my blog list!
Thanks for an informative and beautiful article as usual. Like you, I use container gardens within my garden borders both planted and empty as focal Yours are gorgeous.
May I ask your source for your horizontal /rectangular containers. I have been searching
for them and am finding it difficult to find them. Yours are perfect size and color.
Thanks so much..
Hi Gay, thanks so much for the kind words. Oh, how I wish I had a great source for those containers! I bought those several years ago at Pottery Planet in Santa Cruz, CA. I loved the soft gray colors of them, too. Quality containers are so hard to find, aren’t they? A great source for breathtaking containers can also be found here https://www.eyeofthedaygdc.com/
Hello again, Gay – I wanted to let you know that I just returned from an outing to Pottery World (in Rocklin) and they had rectangular planters that were really similar to the one on my patio. Same size and thickness, only in a dark brown color that was actually really pretty. I’m not sure where you live, but thought I’d let you know!
Dear Rebecca, I am swooning over your lush containers. Each one combines interesting and sculpturally beautiful plant combos. You are as inspiring as your containers and gardens. Thank you!
Sheila, you’re always so sweet to me – what would I do without your HUGE words of encouragement! Thanks you, my friend. 🙂
Hi Rebecca! Great article. I completely agree with all your suggestions. I like to place containers in the planting areas and in key “sitting” areas as well. Always wonderful to see your inspiring work!
Take care, best always,
Sabrina and Freeland
Thanks so much, Sabrina, and have a beautiful weekend (is it cooler there? Thank HEAVENS it’s not so hot this weekend!!) xoxo
31 Comments
I thouroughly enjoyed your article, and learned a great deal. My daughter and I are about to try container gardening in part of the back yard under a live oak. Grass will not grow there, so…we are hoping!
Thank you, Vicki, and best of luck with your new container garden!
Great post and beautiful photos as always. And it’s nice to see that I’m not the only one who likes containers with just one type of plant in them. I’ve actually never been a big container person, but I recently added a wood whiskey barrel pot with just a red geranium in it. I like it because it’s such a classic look and is what my grandma had in her backyard and makes me think of visiting her and the area she lived.
Thanks, Danny! Don’t you love those whisky/wine barrels? We use them all the time at Tahoe where it’s so difficult to plant in the ground due to nightmarish roots and rocky soil. Yours sounds like it’s not only beautiful but the memories it evokes is the icing on the cake.
Well, as usual I’m late in reading your blog. I think it’s because I know it will be jam packed, in a good way, with lovely pictures and great garden information. Love it all. And after reading your comment to Gigi Godfrey I followed the link from her name and discovered wonderful paintings. Sigh, one more place to go but not tonight. I’ll leaver her page up and look at it Sunday.
Hi Barbara, so nice to hear from you and wow – what a sweet comment. Thank you for making my day! 🙂 I’m so glad you’ve explored Gigi’s paintings, aren’t they wonderful? I’m so lucky to have two of them, and not only are they beautiful but Gigi is such an awesome person, as well. Spring is almost here – I hope yours is a glorious one!
Your containers are absolutely stunning and the visual impact is amazing! Containers have always been a challenge for me and the solutions you’ve shared are priceless!
Thank you. Joy
Lamorinda Garden Club
Hi Joy, thank you so much and I’m glad you found a few solutions here on how to use them in your garden!
As always, I love getting your blogs. Can you please give me your source for the Australian Wooly Bush? It is the perfect plant for a boring area in my garden.
Hi Judy, Thanks so much and I’m so happy you enjoy my blog posts! I found both of my Australian Wooly Bush plants (1-gallon, too!) at our local Green Acres. I’ve also seen them in a few nurseries in San Rafael so it seems they’re becoming a little more available than they have been in the past. They’re pretty wonderful plants, so textural and interestingly shaped – just give them a little protection from the blistering sun and frost.
These are beautiful garden photographs! I love your blog, your helpful advice, but I just realized today, looking at these photos, that you are an amazing artist. Each photograph might well be a painting, with the garden as your canvas. It is remarkable, with your artist’s eye and your knowledge of plants and gardening, how you create living fine art. It is also wonderful that you are willing to share it. Thank you!
Carol, what a lovely thing to say! I’m so glad you’re enjoying my blog and photos. 🙂 I really do believe we’re all artists in our own way, whether it’s with traditional mediums, cooking, plants, or even working with computers (you should the magic my husband creates with his coding – ha!!) I hope your garden has fared well through the summer and that it’s nestling down now, getting ready for winter. Thank you, again, for making my morning. xoxoxo
Hello Rebecca,
Beautiful and inspirational container plantings! I have a question reg the patio planting (one rectangle planter on the ground, and another raised on legs, appears to be wrought iron). There is a large ivy growing in a wreath-like shape to the left of the photo. Is they ivy growing out of the raised planter? If so, how did you train it to grow in a circle? Is there a wire support underneath the ivy? Is it attached to the wall or somehow attached to the planter? Also, do you water by hand or use a drip irrigation system? I live in Folsom, so I know how very disciplined a gardener must be to water by hand…missing even one day in the summer =s dead plants!
Thanks for the kind words, Cheri! Yes, that one is wrought iron and the ivy is actually a topiary that I was given on my 30th birthday (many, many moons ago!) It’s a raised planter with several containers in it, the ivy being one of them. If I rely on myself to keep my pots watered, they’d be in a sad state for sure (especially with this heat!) so I have them hooked up to irrigation. I love the wire planter, as I can discreetly run a 1/4″ tube up the leg and into the pots. I’ll then sometimes place pots below the raised one, so they can take advantage of the extra water that runs through. Don’t want to waste a single drop! 🙂
What a clever idea! I see those ivy topiary plants at the garden center all the time! Planting the bottom of the iron planter is a great idea too! I see an iron planter going on my wish list… 🙂 Thanks for the info.
You’re so welcome!
Love all your pots, fell in love with your pomegranate in your Los Altos home, the color is wonderful. I am an addict for succulents in pots and always love to see your combinations., you have such a nice collection of pots.
Thanks so much, Susan! That pomegranate has been with me for years now – I wish more people could easily find them (I’ve yet to ever see one in the nursery since!) Succulents are certainly some of the most forgiving plants of all, aren’t they?
I enjoyed your post, you are so creative, you always inspire me. The garden is in full bloom here on Bainbridge Island–everything beautiful! Hope to see you soon.
Hi Gigi – Thanks so much! And WOW WOW WOW – your latest blog post and GORGEOUS paintings are amazing. You are so dang talented, my friend!!! Glad your garden is thriving – send more pics when you can! xoxoxo
As always wonderful and inspirational ideas. I always get great ideas including what to do with my adorable cement bunny with a too small for almost anything I could think of empty bag over his shoulder. Sedums will do it and cascade and look wonderful all year. I have lots of succulents but in the Northwest they would not all winter over–I an lucky to be able to put them inside my sun-room for the winter and rainy season. I especially enjoy your “findings” made into garden art. Keep up your wonderful work.
Thanks so much, Joan, and I’m so glad your bunny now has something to carry in his bag! There’s so many sedums out there, ‘Angelina’ is a favorite with its bright and fresh green color. You could tuck a teeny tiny easter egg in there, too. Send a pic when you’ve planted it – I’d love to see! 🙂
I was just sent your posting by a friend. Please add me to your email list. Thanks!!
Hi Gail – nice to ‘meet’ you, and I’m happy to add you to my blog list!
Thanks for an informative and beautiful article as usual. Like you, I use container gardens within my garden borders both planted and empty as focal Yours are gorgeous.
May I ask your source for your horizontal /rectangular containers. I have been searching
for them and am finding it difficult to find them. Yours are perfect size and color.
Thanks so much..
Hi Gay, thanks so much for the kind words. Oh, how I wish I had a great source for those containers! I bought those several years ago at Pottery Planet in Santa Cruz, CA. I loved the soft gray colors of them, too. Quality containers are so hard to find, aren’t they? A great source for breathtaking containers can also be found here https://www.eyeofthedaygdc.com/
Hello again, Gay – I wanted to let you know that I just returned from an outing to Pottery World (in Rocklin) and they had rectangular planters that were really similar to the one on my patio. Same size and thickness, only in a dark brown color that was actually really pretty. I’m not sure where you live, but thought I’d let you know!
Dear Rebecca, I am swooning over your lush containers. Each one combines interesting and sculpturally beautiful plant combos. You are as inspiring as your containers and gardens. Thank you!
Sheila, you’re always so sweet to me – what would I do without your HUGE words of encouragement! Thanks you, my friend. 🙂
Hi Rebecca! Great article. I completely agree with all your suggestions. I like to place containers in the planting areas and in key “sitting” areas as well. Always wonderful to see your inspiring work!
Take care, best always,
Sabrina and Freeland
Thanks so much, Sabrina, and have a beautiful weekend (is it cooler there? Thank HEAVENS it’s not so hot this weekend!!) xoxo