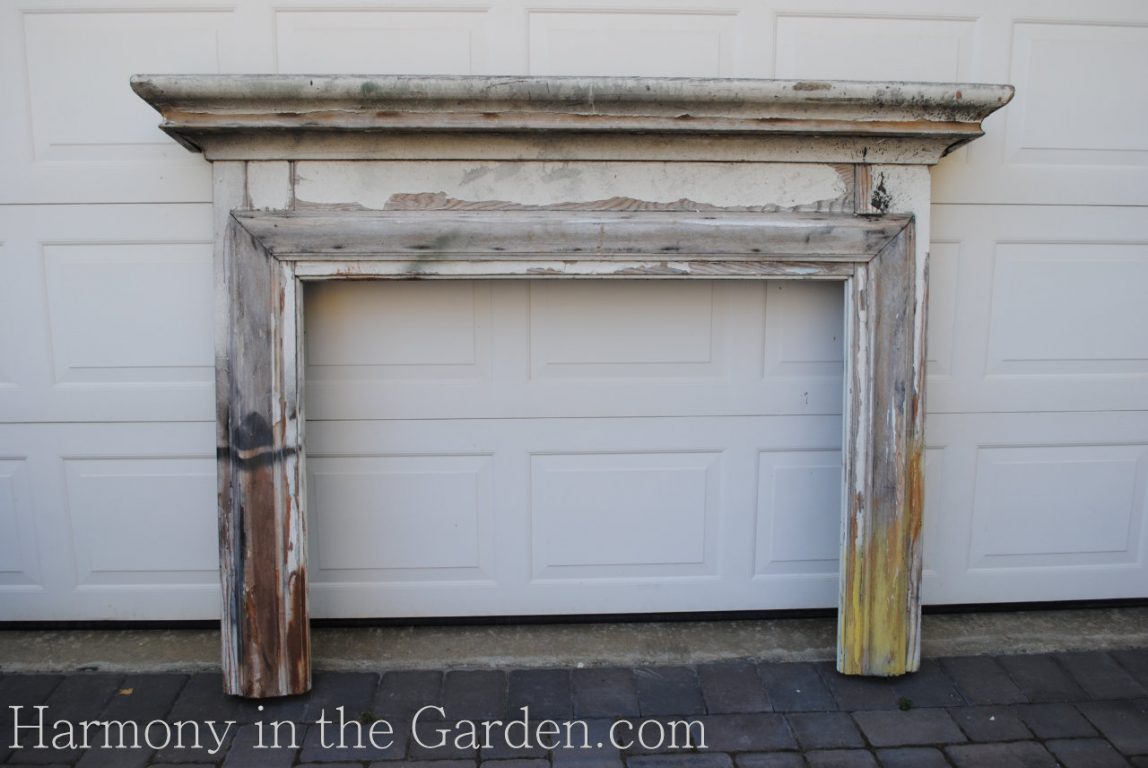
Today I wanted to share how I repurposed a fireplace mantle in the garden.
While driving around in the rain one day, I spotted this mantle leaning next to a dumpster.
The dumpster was located behind a furniture staging company, but this neglected mantle looked like it had been there a long time.
I called the company who said if I could haul it away, I could have it!
Dumpster diving at its best!
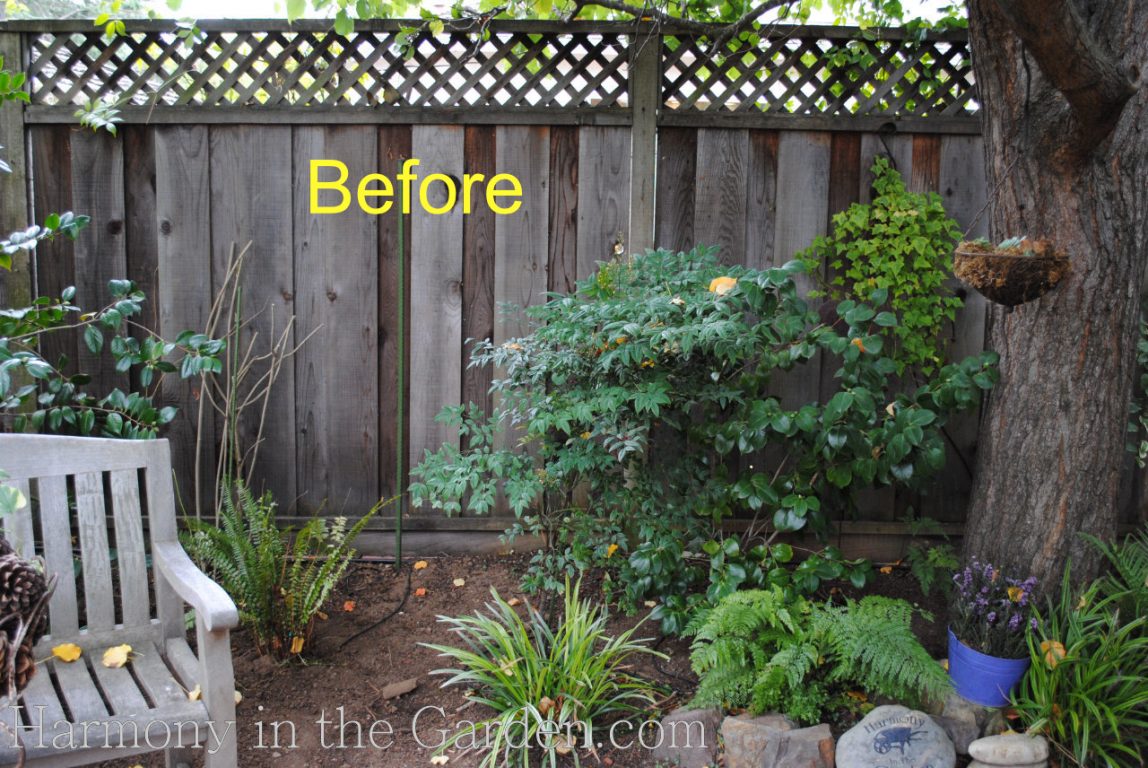
Once I got it home (no easy feat as we had to tie it to the top of my SUV) I knew right where I’d put it.
In the very back of my garden, right outside of my office, there is a shady area with a mish-mash of plants and a ho-hum fence.
This would be the perfect spot for a focal point fence!
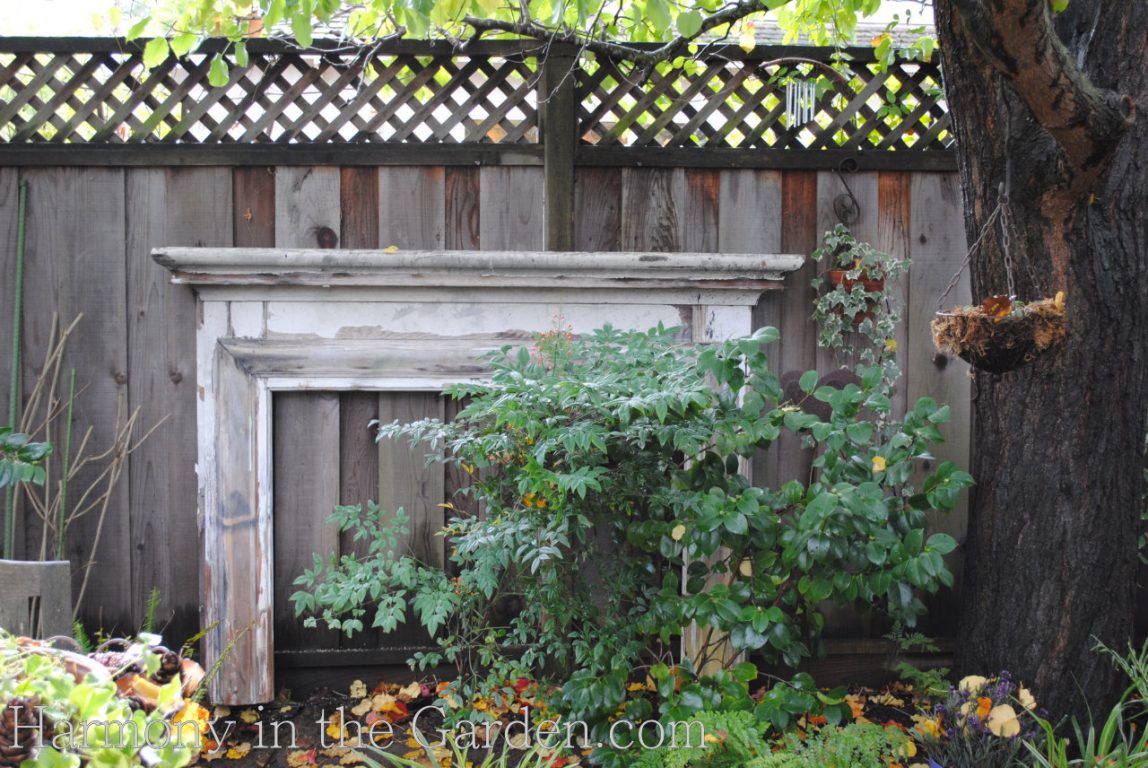
The first step was to securely attach it to the fence so it wouldn’t tip over in a storm.
Then came the fun part – sprucing it up while figuring out which plants to keep and which to move.
This space has always been difficult to plant as anything planted has to compete with the neighboring tree’s giant roots.
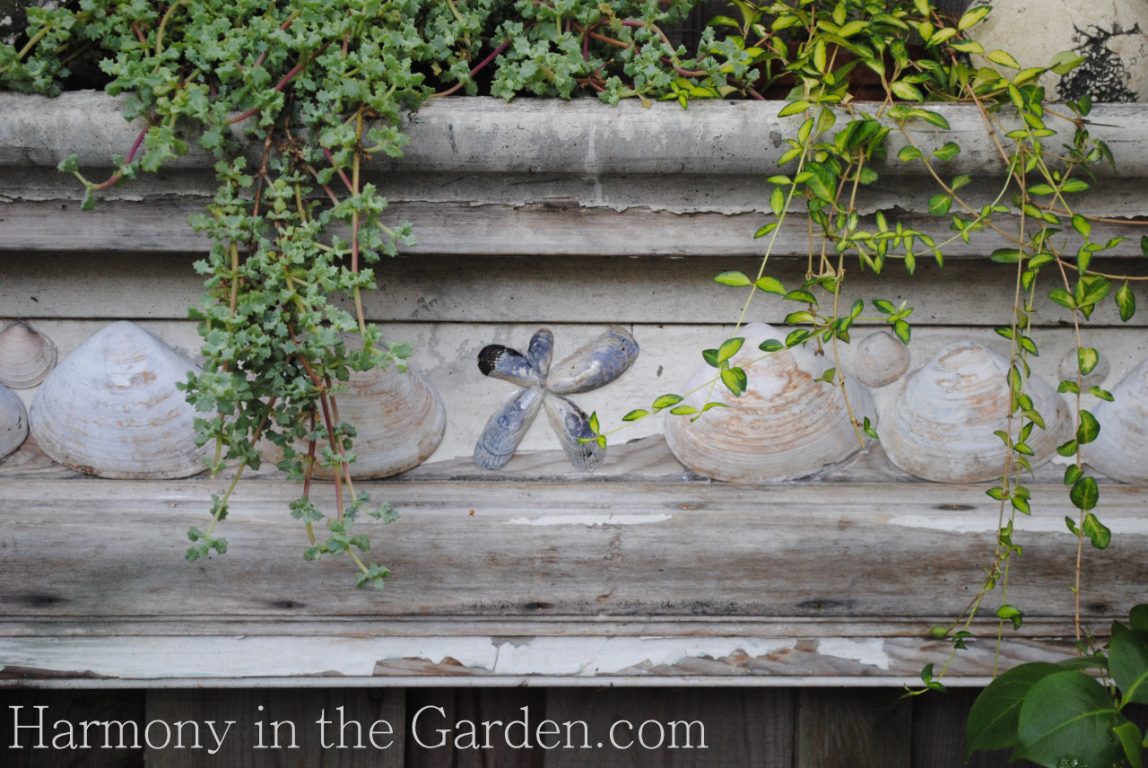
With a little help from my hot glue gun, some of the shells from my ever-growing shell collection were finally put to good use!
And the fact that these shells hold endearing memories from past vacations makes it all that more special.
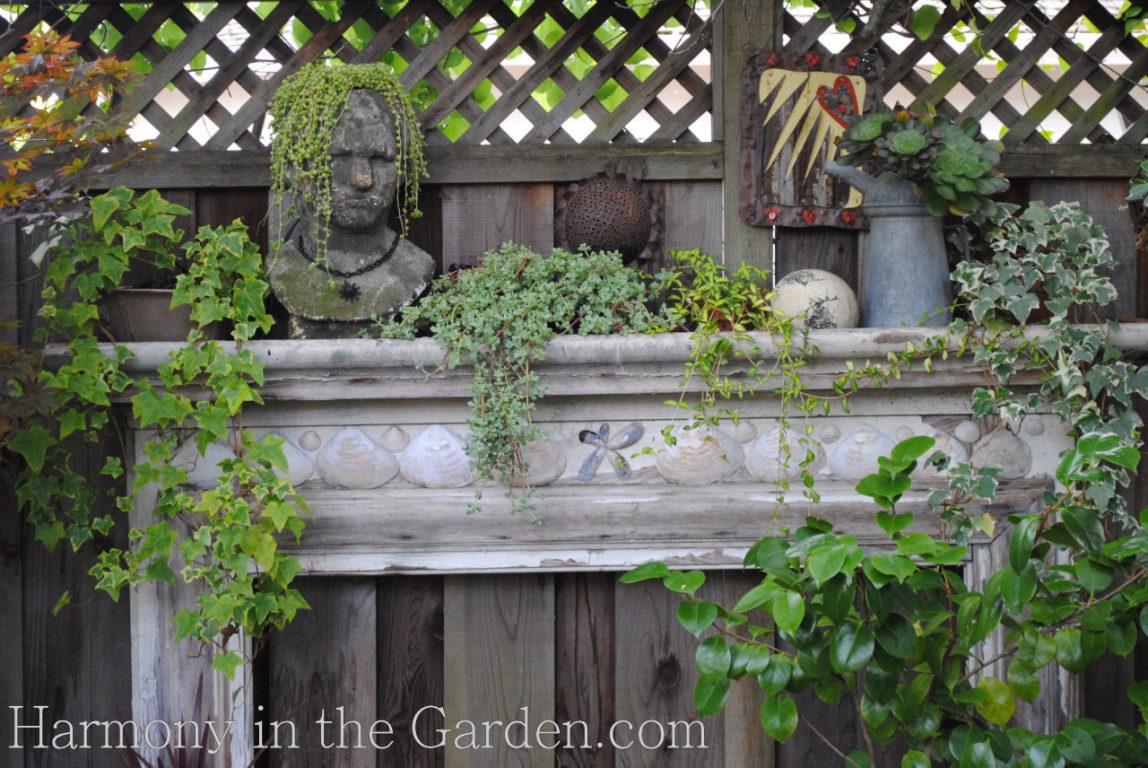
I knew I wanted pots of trailing plants on top of the mantle, but was worried about water rotting this already weathered piece of wood.
The solution was pretty simple.
After placing the pots ‘just so’ we drilled large drainage holes along the top so the pots could nestle down in them, and the water could freely drain through to the ground.
And, because the pots are sunk down in the holes, they’re less likely to be tipped over by wandering raccoons.
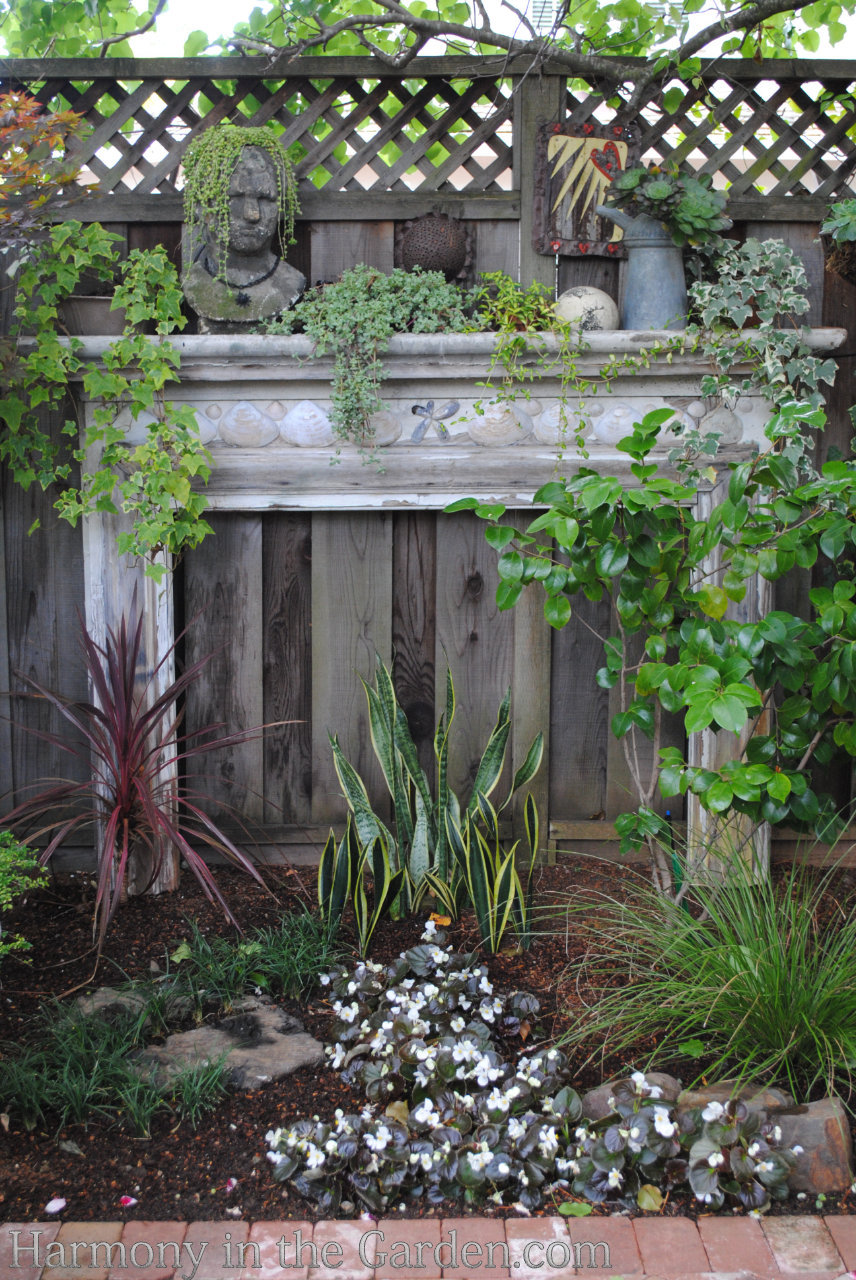
When I first put this up in March, we were hit with an unexpectedly wicked storm, which blew everything off the top of my mantle.
Even the very heavy head!
My beloved head broke into a dozen pieces, but my husband painstakingly glued them back together, using cement and chicken wire to fill in where needed, and to provide additional support.
It’s great to be married to such a handy guy!!
We also secured the head to the fence with a black chain, and attached a piece of inexpensive jewelry to give him a little more ‘flair’.
The plants were a little trickier to figure out.
I wanted something to represent the flames of a fire, but whatever I chose had to survive in total shade.
Sansaveria can be a little ‘iffy’ in our area, but I’m hoping it survives the winter since it’s in a fairly protected spot. I love how they have the perfect ‘flame’ shape!
I’m not exactly sure what I was thinking when I planted the little begonias and mondo grass – but I like how they seem to flow out from the flames.

I also planted a Japanese Maple (acer ‘Firepower’) next to the mantle, hoping the fall colors would look like ‘glowing embers.’
I just love it!
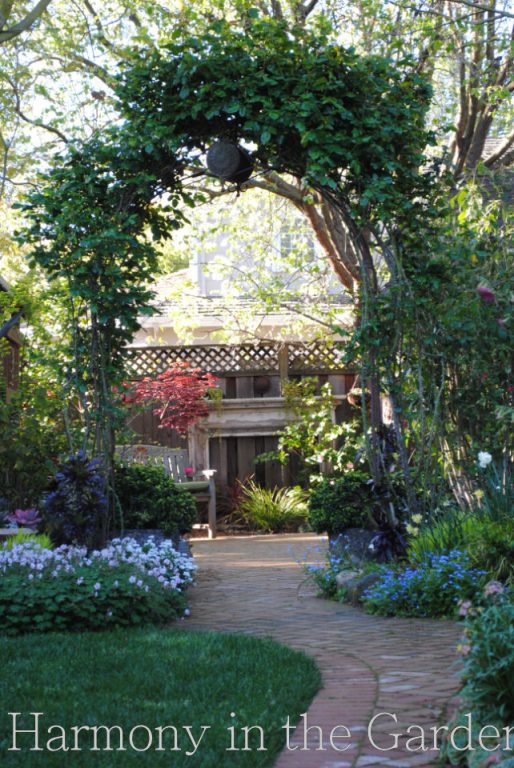
Overall, it’s mission accomplished!
I love how the arched arbor frames the fireplace – sort of a ‘focal point within a focal point’!
And thanks to the glow of the Japanese Maple, it’s the perfect way to entice guests to keep on exploring the garden.






30 Comments
hiya I’m actually in the process of restoring my fire surround in my garden and was wondering how you’ve secured your fire surround to your fence ? as l know drilling concrete posts can weaken them and we have concrete and not wooden posts?
Hi Jayne, we didn’t attach it directly to the fence but poured concrete around the posts of our fireplace surround and buried it in the ground so it didn’t show, to increase it’s stability. The fence was old, so we didn’t want to add any more weight to it – especially once winter hits.
I love this mantle!! It looks terrifc. I am wondering if I can do something like it in my back yard. Thanks for sharing.
Hi, I found you from a link on Facebook… and wow. What a fabulous project. I admire your eye for the exact combination of ‘pieces of flair’. The final outcome is impressive. Thank you for sharing the steps (and yes, nice to have a handy, determined hubby) from beginning to end. The curving pathway and visual from that vantage point in the last picture beckons you to venture all the way to the end destination. Just lovely. Meems
Thank you so much, Meems! I’m so glad you stopped by my blog and appreciate my ‘pieces of flair’, too! And you’re absolutely right, the curving pathway was designed to entice someone to want to walk to the end, especially when they see a little something waiting for them…
This is absolutely beautiful! Love the idea and how it fits into your garden space. Nicely done!!
Thank you Kimberly! We weren’t sure if our garden would have the room for it, but it actually does tuck right in there nicely. Sort of hidden, sort of visible…
You know how much I love this…I think I took 24 photos of it when I was ogling everything.
Love how you planted the “flames.” BRILLIANT.
Hugs,
Sharon
Sharon – do you remember the storm we had when you were here (how could you forget, right?) Well, it blew the poor guy off the mantle and just shattered him. I wish you could see the brilliant job Tom did of piecing him back together – its very impressive, indeed!!
Oh that is so cool! Love it!
Thanks, Ella!
Oh wow. I wish I had half a clue what to do with anything outside. You have no idea how much your talent means to me.
Elisa, you make me laugh. I checked out your blog and I’m fairly confident you have more than ‘half a clue’! ha! Thanks for the compliment and for stopping by my blog!
It’s all perfectly done, Rebecca, especially those whimsical “flames.” Chanticleer worthy!
*Chanticleer worthy* – wow, what a compliment! Especially coming from you, Pam! Many thanks…hope you can see it in person sometime soon!
What a great idea! I love the “flames” … perfect!
Thanks Patty, Janine, Delone and Lynn – your comments mean the world to me and I’m so glad you all like my little creation!
total score. and yes, the flames totally rock it!!!
Just found your blog – Beautiful! Love the mantel in the garden, Sanseveria is a great idea for “flame.” Thanks for sharing.
Rebecca, that is a perfect piece for your garden and exactly the right location for it. I love how you continually take us on these pictorial journeys with your posts. Can’t wait for the next one! L
Wow, this post makes me smile. In the past you spoke about the ‘head pot’ meeting it’s demise during the storm. I was sad since I’m quite fond of ‘head’ pots, but I never saw the original. The ‘smirk’ on his face is awesome, especially with the string of pearls hair. You once told me that pots weren’t your strength. Liar!
Thanks Sheila – I like his ‘smirk’, too! He’s a dapper little guy, isn’t he?
Love it, especially the green flames. I’m always looking for good junk, so I appreciate the work of a master. Er, mistress. You know what I mean.
Helen – I, too, am a dumpster diver and have found the coolest stuff that people have thrown away. I always think ‘are they insane?’, which is precisely what they’re thinking about me!
Love, love, love, love, LOVE this idea! Did I mention how much I love this?? It has everything I adore–weathered pieces, succulents, head planters and just a touch of whimsy without being too cute. Great job, Rebecca!
Thanks Jenny – I was afraid I might’ve gone over to the ‘dark side’ and tried my best to de-cute it a bit.
that is absolutely gorgeous! I have a mantle in my garage (found at a flea market) that is begging for a home. Maybe your idea is just the ticket???
Good for you, Kathleen! I’d love to see a photo of it when you find its new home!!
I love re-purposing fireplaces in the garden… yours looks lovely.
Thanks Jenn!